Vegan Pumpkin Dinner Rolls
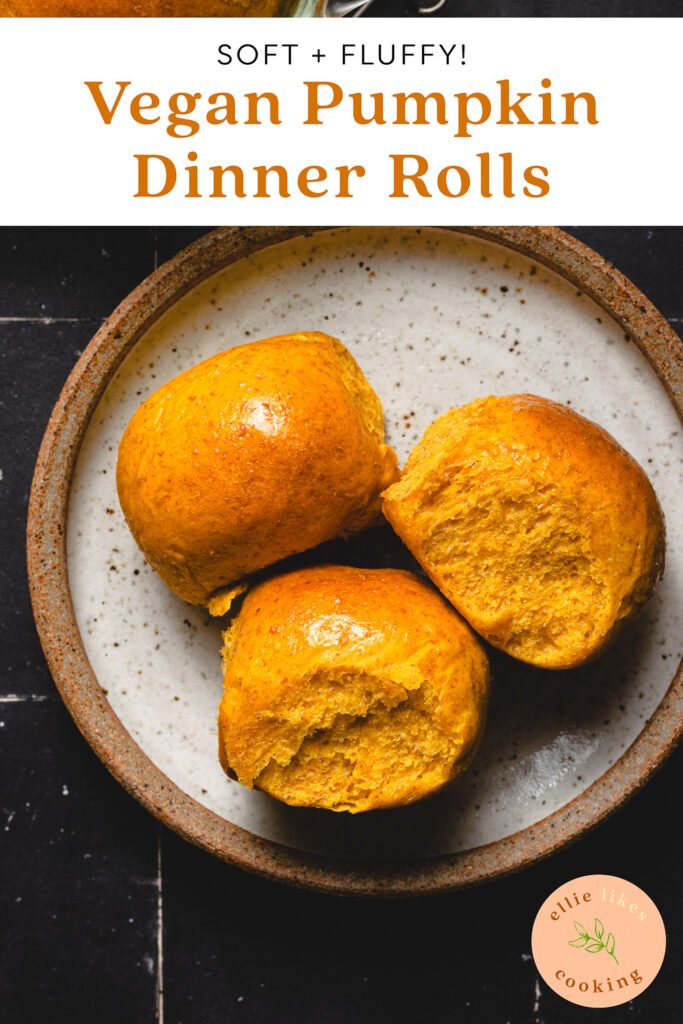
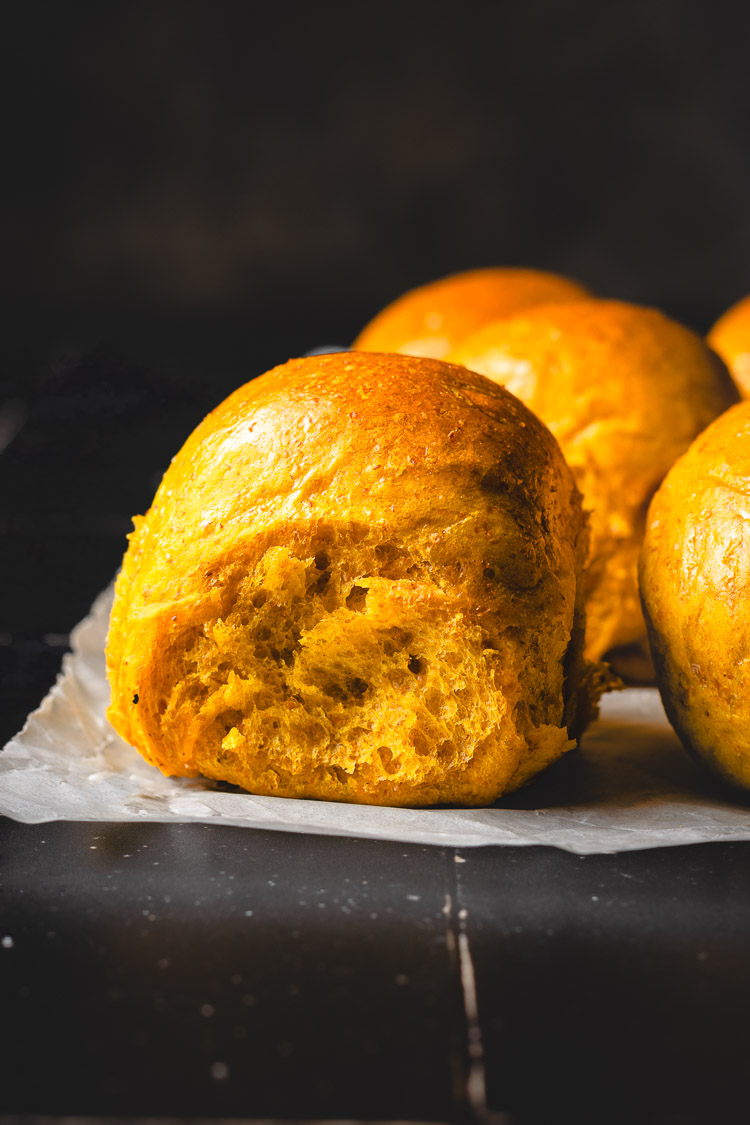
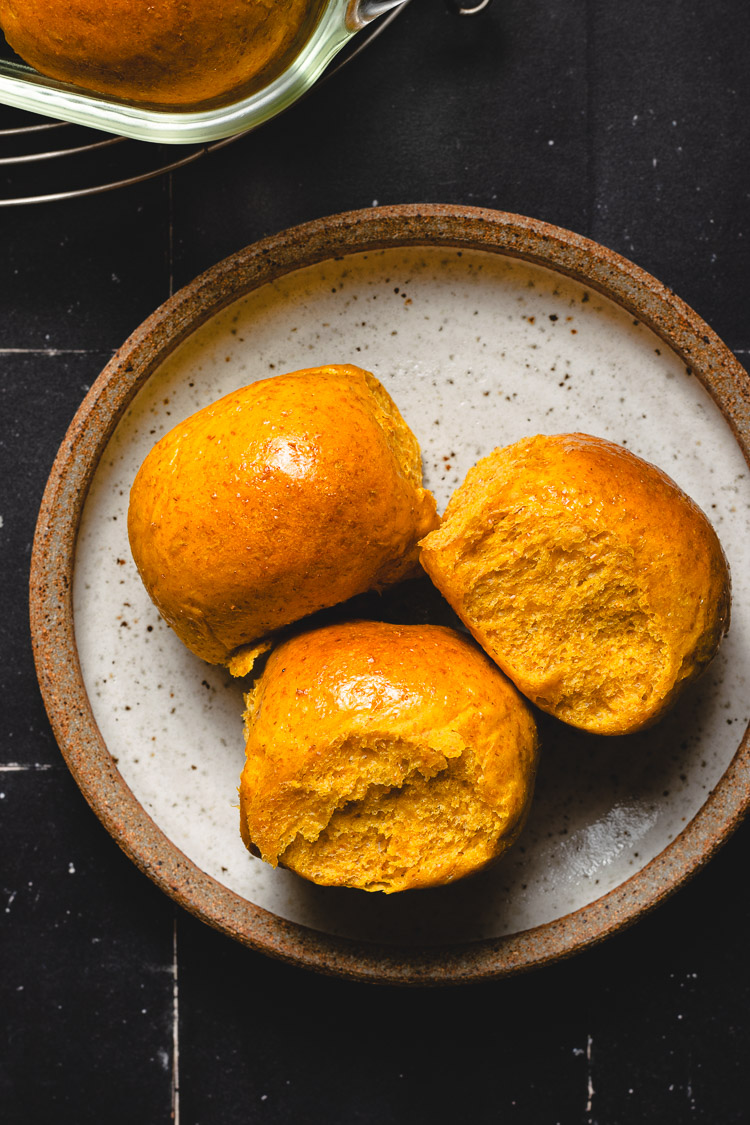
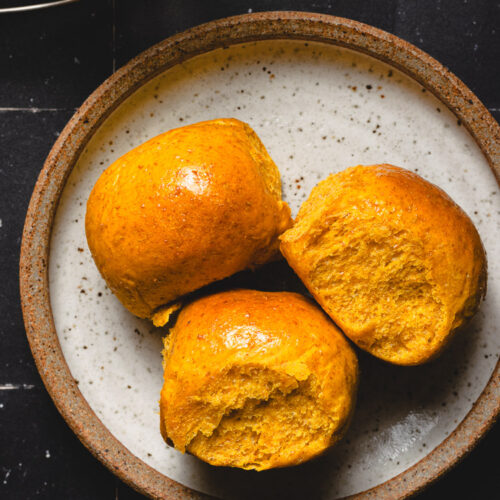
Impress vegan skeptics with these pumpkin dinner rolls that are so soft, fluffy, and buttery despite not containing eggs or dairy!
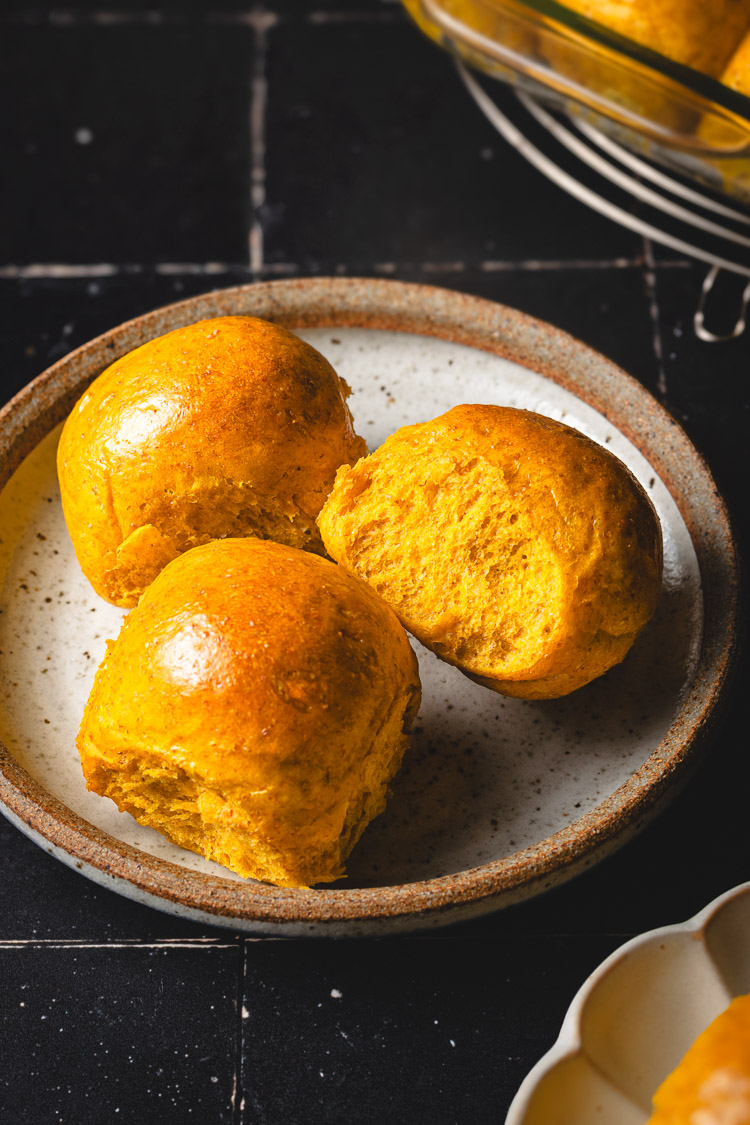
These pumpkin dinner rolls were a huge hit with my family for Thanksgiving, and I know I’ll be making them every holiday from now on! But you don’t need to wait for a holiday to make them either, they’d be delicious any time of year. And they’re a great way to use up that canned pumpkin you hoarded during the holiday sales!
How to Make
There are four main stages to making these pumpkin dinner rolls:
- Knead Dough ⟶ Ideally using a stand mixer to achieve perfectly soft and fluffy rolls.
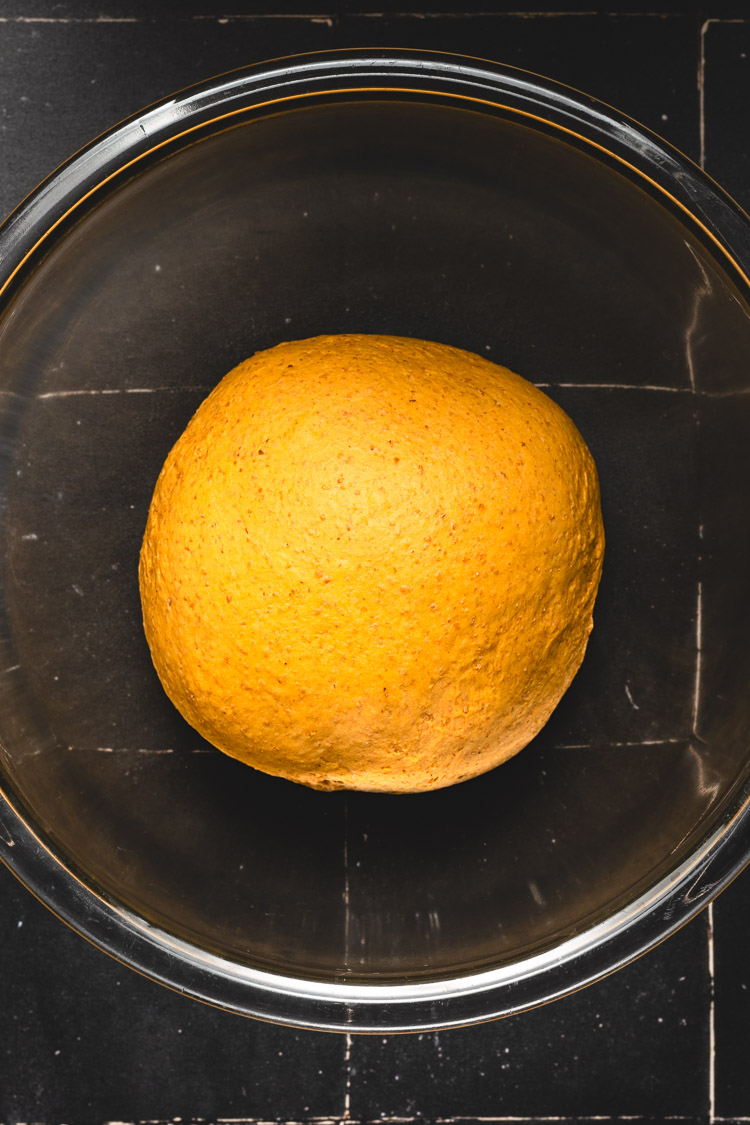
- First Rise ⟶ Shape into one big ball and rise in a large bowl for 1-2 hours, depending on how warm your room is. To speed up the rise, you can use the bread proof setting if your oven has one; or place the dough in the oven with a pot of just-boiled water (the steam will create a warm environment for the dough to rise) and close the oven.
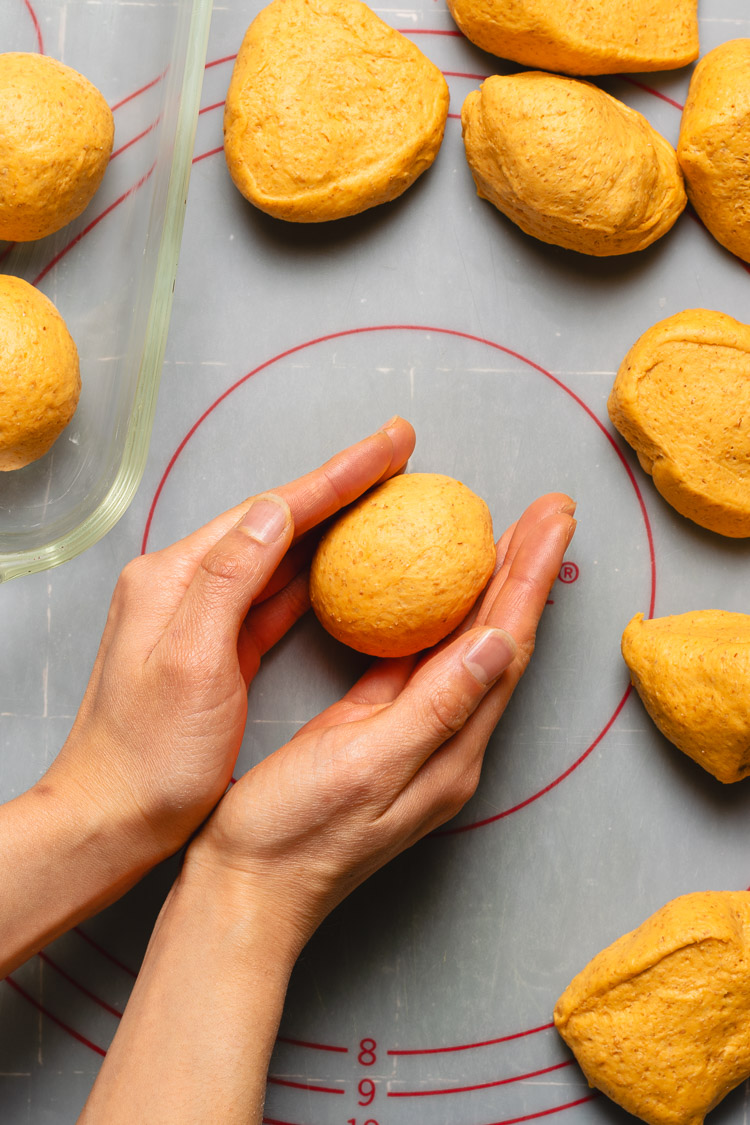
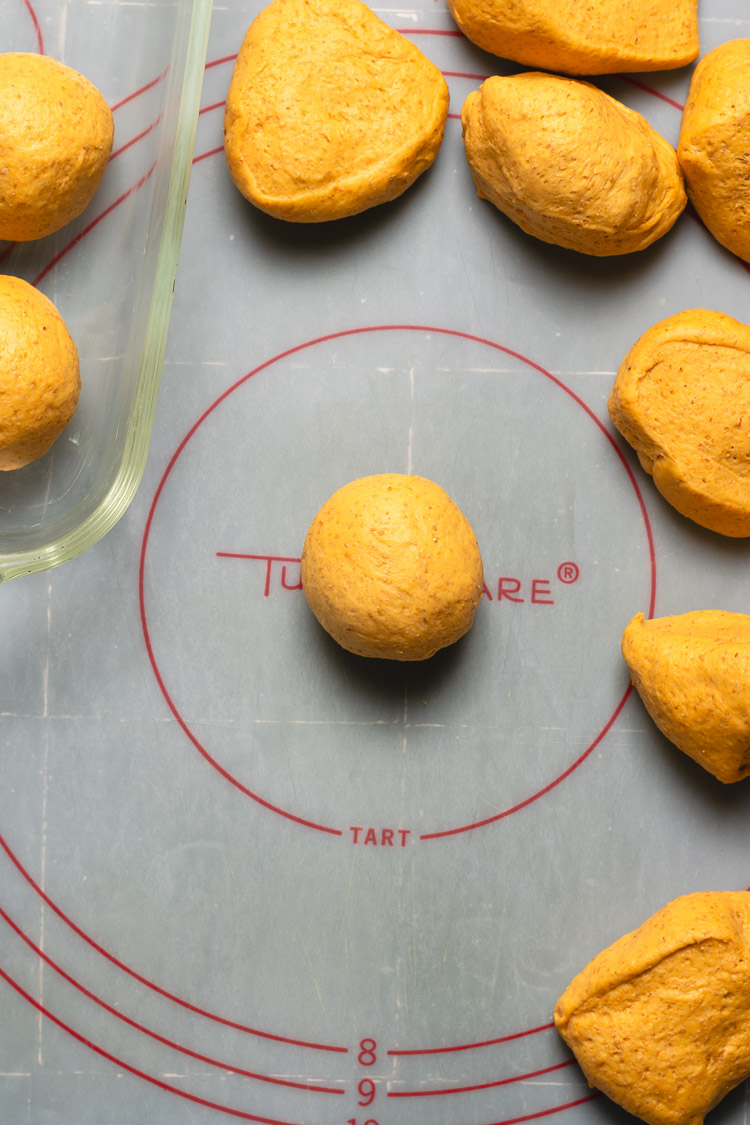
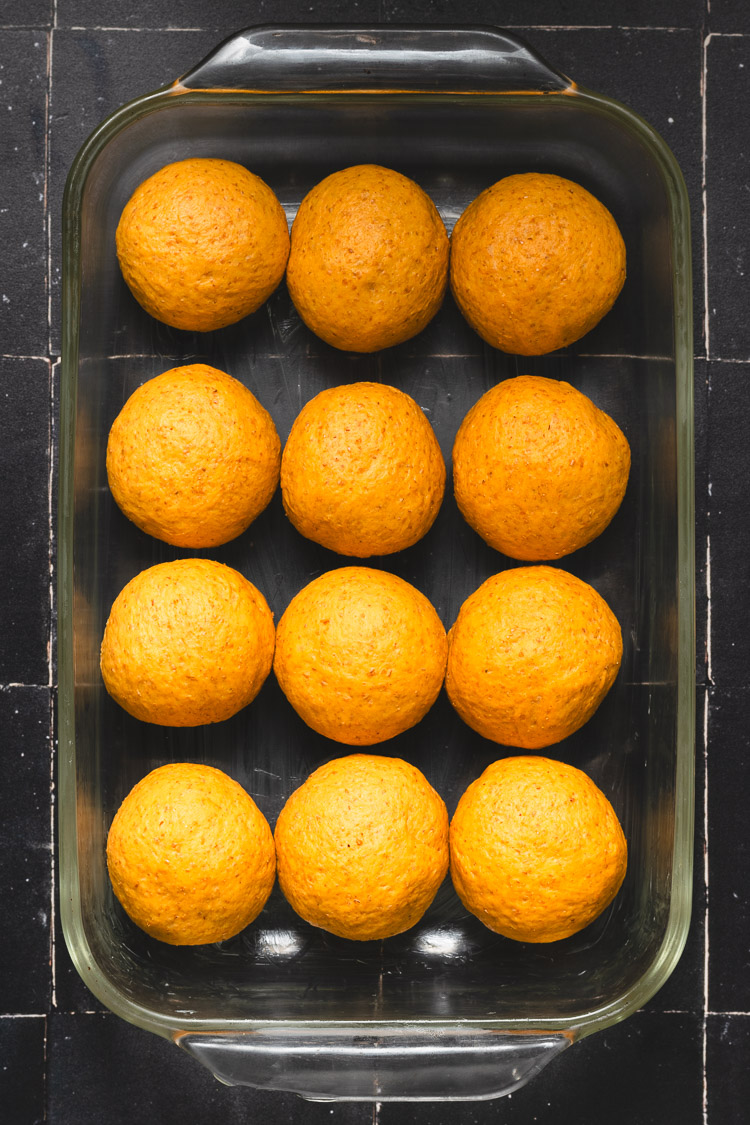
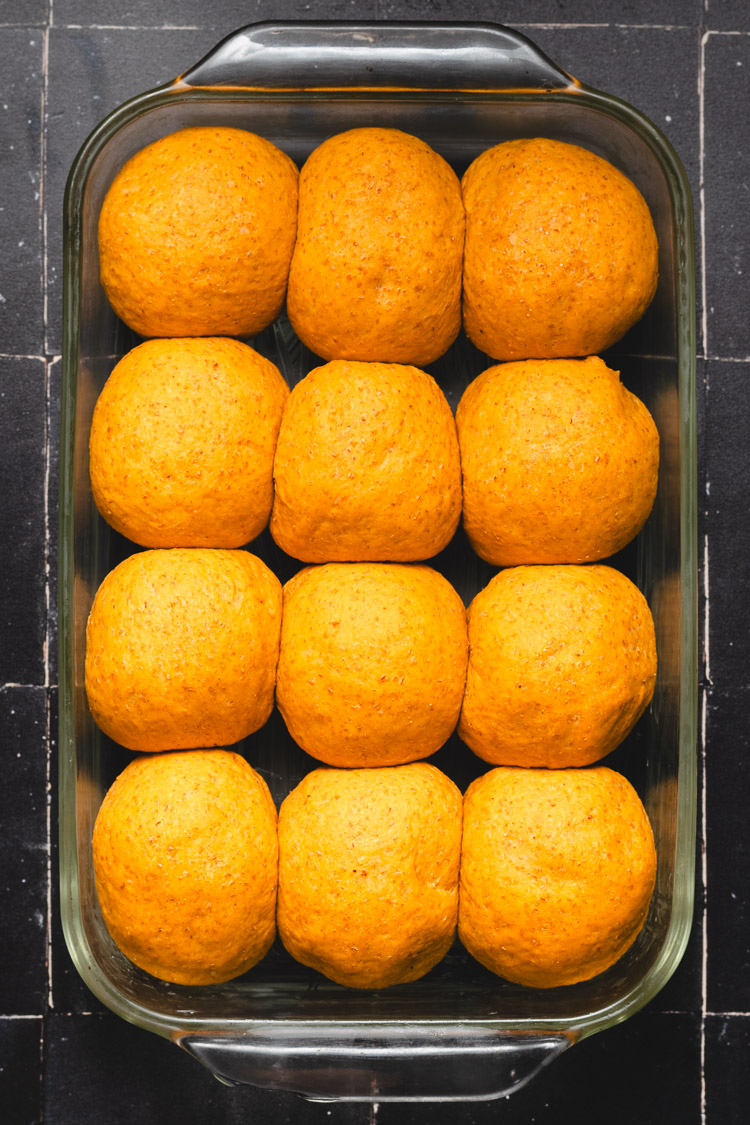
- Second Rise ⟶ Divide dough into small bread rolls and let it rise again.
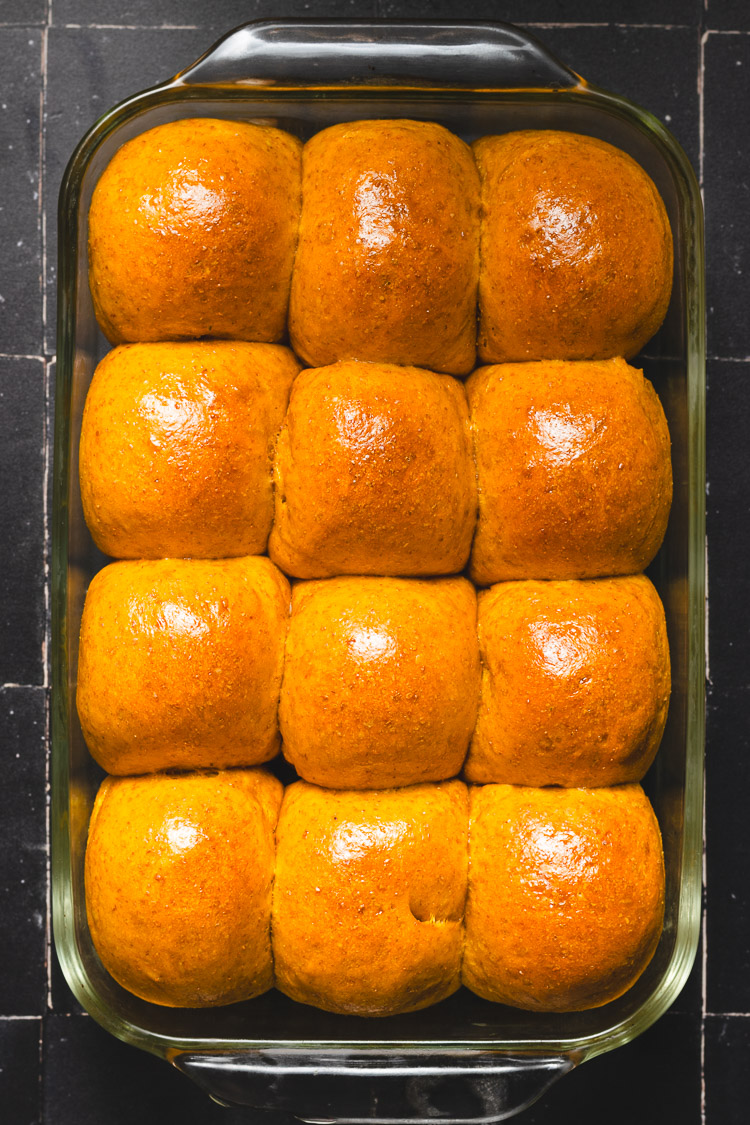
- Bake ⟶ Bake until golden brown on top. The edges should be cooked but still soft.
Tips for Success
Use a stand mixer ⟶ The dough will be very wet and sticky at first, and if you’re new to bread making, you may struggle to knead the dough effectively with your hands. You can knead by hand, but a stand mixer is much easier.
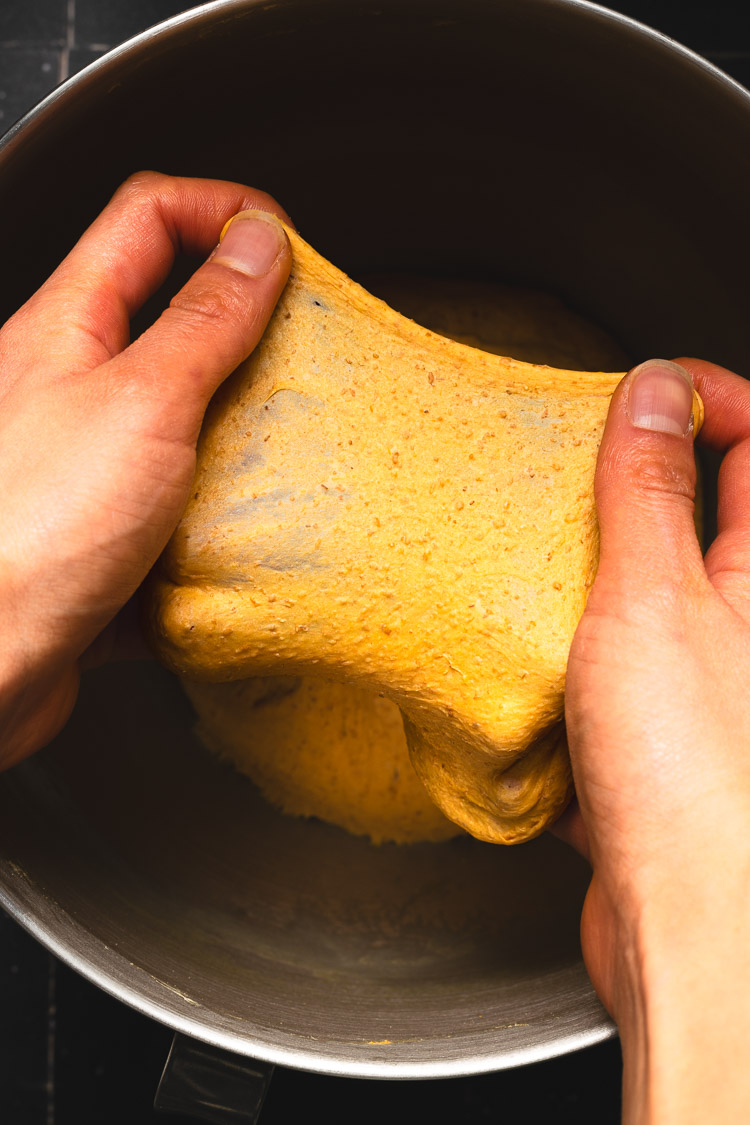
Knead until windowpane ⟶ Again, this is much easier with a stand mixer (especially if you are using some whole wheat flour). Gently pull from four corners of dough to create a square. If you can stretch the dough out into a very thin membrane without it breaking, it is sufficiently kneaded. See this post from The Kitchn for more details on the windowpane test.
Use gram measurements ⟶ Always bake with gram measurements when possible for the most accuracy! A kitchen scale* is an essential baking tool in my opinion.
Use good quality pumpkin ⟶ You can make your own pumpkin puree, or use a good quality canned pumpkin like Libby’s or Trader Joe’s.
Pumpkin Dinner Rolls FAQ
How do I store pumpkin dinner rolls?
Store these rolls in an airtight container at room temperature for up to 3 days. For longer storage, tear apart into individual rolls, place in freezer safe bags/containers, and freeze for up to 2 months.
Why did my rolls turn out dense?
This can have many different causes, but some areas to look at are under-kneading (did it pass the windowpane test?), under or over-proofing, expired yeast, or not baking the bread long enough.
Are dinner rolls vegan?
Typical dinner rolls are often not vegan since they usually contain butter and milk to make them extra soft, and may be brushed with an egg wash for a shiny finish. However, these dinner rolls are easily made vegan/plant-based using soy milk (or another plant milk of choice) and vegan butter.
Can I use active dry yeast instead?
Yes, but you must proof it first. To do this, warm the plant milk to 100°F (do not exceed 110°F or the yeast will die) and add the yeast and a teaspoon of sugar. Mix and then let the mixture sit for 5-10 minutes until it foams and bubbles. Then add the rest of the dough ingredients and continue with the recipe.
Can I prep them the day before?
You can do either the first or second rise overnight in the fridge the day before you bake the rolls. You will need to let the dough sit at room temperature for about an hour before baking (or continuing to the second rise if you do the first rise overnight).
More Vegan Pumpkin Recipes
- Pumpkin Biscuits
- Pumpkin Coffee Cake
- Pumpkin Nut Muffins
- Pumpkin Granola
- Pumpkin Pie
- Pumpkin Oat Pancakes
- Pumpkin Melon Pan
- Pumpkin Scones
If you make these pumpkin dinner rolls, don’t forget to leave a comment/rating down below and tag me in your photos on instagram @ellielikes.cooking. I love seeing all of your tasty recreations!
Vegan Pumpkin Dinner Rolls (Large Batch)
Ingredients
- 120 ml (½ cup) unsweetened soy milk or milk of choice
- 200 grams (¾ cup + 4 tsp) pumpkin puree
- 26 grams (2 tbsp) sugar
- 226 grams (1¾ cups + 2 tbsp) bread flour
- 160 grams (1¼ cups + 4 tsp) whole wheat flour or more bread flour
- 1⅓ tsp
vital wheat gluten* omit if using all bread flour - ½ tsp salt
- 1⅓ tsp
instant yeast* - 52 grams (4 tbsp) vegan butter
Glaze (Optional)
- 1 tbsp unsweetened soy milk
- 1 tsp maple syrup
Instructions
Make Dough (Stand Mixer)
- Add milk, pumpkin puree, and sugar to the bowl of your stand mixer. Add bread flour, wheat flour, and vital wheat gluten on top. Add salt to one side of the bowl and instant yeast to the other side.
- Attach a dough hook to your stand mixer. Turn it on at low speed to combine the ingredients, then gradually increase speed to medium as the dough comes together. Knead on medium for about 5 minutes. The dough should come together into a ball and loose most of its stickiness. Turn off the stand mixer, cover with a towel, and let the dough rest for 10 minutes.
- Turn the mixer back on at low speed and gradually add in the butter pieces. Increase the speed to medium as the butter gets incorporated into the dough. Continue kneading on medium speed (4-5) for about 10-15 minutes. You can stop to scrape down the dough if needed.
Make Dough (By Hand)
- Clean a work surface or set out a large pastry mat and lightly dust with bread flour.
- Whisk together flours, vital wheat gluten, sugar, salt, and yeast. Pour in soy milk and pumpkin puree and use a wooden spoon to mix until a dough starts to form. Gather the dough into a loose ball and transfer to your work surface.
- Knead the dough for 5-10 minutes until a tight dough forms and it looses most of its stickiness. If the dough is too sticky, you can sprinkle some flour on top but try not to add too much flour or your bread will turn out dense. Dough will stick to your hands during kneading at first but just keep kneading! Cover and let the dough rest for 10 minutes.
- Stretch the dough out into a long rectangle and add the butter pieces on top. Roll up the dough and continue kneading. It will be very messy and greasy at first but keep going! After a couple minutes the dough will become smooth and easier to work with.
- Continue kneading for another 10-15 minutes.
Windowpane Test
- Use the windowpane test to check if the dough is sufficiently kneaded. Tear off a small piece of dough and gently stretch it into a square, pulling at the four corners. You should be able to stretch the dough out into a very thin membrane that light can pass through. If the dough tears easily, it needs to be kneaded longer.
First Rise
- Shape the dough into a ball and place in a large bowl (you can use the bowl of your stand mixer). Cover with a towel or plastic wrap and set on the counter to rise for 1-2 hours until doubled in size.
- To test if the dough is ready, use your finger to poke a hole in the center of the dough. If the hole doesn't close up, it's ready.
Second Rise
- Grease a 9"x13" baking pan with vegan butter.
- Punch down the dough and transfer to your work surface. Shape into a ball, then use a dough scraper to divide into 12 pieces.
- Shape each piece into a ball and place in the baking pan, leaving some space between each ball.
- Cover the dough and set aside to rise for about 40 minutes or until doubled in size.
- When the dough has risen a little over halfway (after about 20 minutes), preheat oven to 350°F/180°C.
Bake
- Uncover dough and lightly brush the tops with soy milk.
- Bake for about 25 minutes until golden brown. The edges should be cooked and the rolls will sound hollow if you tap them.
- Place the pan on a wire rack.
- Whisk together soy milk and maple syrup. While the rolls are still warm, brush the tops with the glaze (this will make them look shiny and keep the tops soft).
- Rolls are best served warm after cooling in the pan for a few minutes.
Vegan Pumpkin Dinner Rolls

Ingredients
- 90 ml (¼ cup + 2 tbsp) unsweetened soy milk or other milk of choice
- 150 grams (½ cup + 2 tbsp) pumpkin puree
- 20 grams (1 tbsp + 2 tsp) sugar
- 170 grams (1½ cups – 4 tsp) bread flour
- 120 grams (1 cup) whole wheat flour or more bread flour
- 1 tsp
vital wheat gluten* omit if using all bread flour - ¼ + ⅛ tsp salt
- 1 tsp
instant yeast* - 40 grams (3 tbsp) vegan butter cubed
Instructions
Make Dough (Stand Mixer)
- Add milk, pumpkin puree, and sugar to the bowl of your stand mixer. Add bread flour, wheat flour, and vital wheat gluten on top. Add salt to one side of the bowl and instant yeast to the other side.
- Attach a dough hook to your stand mixer. Turn it on at low speed to combine the ingredients, then gradually increase speed to medium as the dough comes together. Knead on medium for about 5 minutes. The dough should come together into a ball and loose most of its stickiness. Turn off the stand mixer, cover with a towel, and let the dough rest for 10 minutes.
- Turn the mixer back on at low speed and gradually add in the butter pieces. Increase the speed to medium as the butter gets incorporated into the dough. Continue kneading on medium speed (4-5) for about 10-15 minutes. You can stop to scrape down the dough if needed.
Make Dough (By Hand)
- Clean a work surface or set out a large pastry mat and lightly dust with bread flour.
- Whisk together flours, vital wheat gluten, sugar, salt, and yeast. Pour in soy milk and pumpkin puree and use a wooden spoon to mix until a dough starts to form. Gather the dough into a loose ball and transfer to your work surface.
- Knead the dough for 5-10 minutes until a tight dough forms and it looses most of its stickiness. If the dough is too sticky, you can sprinkle some flour on top but try not to add too much flour or your bread will turn out dense. Dough will stick to your hands during kneading at first but just keep kneading! Cover and let the dough rest for 10 minutes.
- Stretch the dough out into a long rectangle and add the butter pieces on top. Roll up the dough and continue kneading. It will be very messy and greasy at first but keep going! After a couple minutes the dough will become smooth and easier to work with.
- Continue kneading for another 10-15 minutes.
Windowpane Test
- Use the windowpane test to check if the dough is sufficiently kneaded. Tear off a small piece of dough and gently stretch it into a square, pulling at the four corners. You should be able to stretch the dough out into a very thin membrane that light can pass through. If the dough tears easily, it needs to be kneaded longer.
First Rise
- Shape the dough into a ball and place in a large bowl (you can use the bowl of your stand mixer). Cover with a towel or plastic wrap and set on the counter to rise for 1-2 hours until doubled in size.
- To test if the dough is ready, use your finger to poke a hole in the center of the dough. If the hole doesn't close up, it's ready.
Second Rise
- Grease a 9"x9" baking pan with vegan butter.
- Punch down the dough and transfer to your work surface. Shape into a ball, then use a dough scraper to divide into 9 pieces.
- Shape each piece into a ball and place in the baking pan, leaving some space between each ball.
- Cover the dough and set aside to rise for about 40 minutes or until doubled in size.
- When the dough has risen a little over halfway (after about 20 minutes), preheat oven to 350°F/180°C.
Bake
- Uncover dough and lightly brush the tops with soy milk.
- Bake for about 25 minutes until golden brown. The edges should be cooked and the rolls will sound hollow if you tap them.
- Place the pan on a wire rack.
- Whisk together soy milk and maple syrup. While the rolls are still warm, brush the tops with the glaze (this will make them look shiny and keep the tops soft).
- Rolls are best served warm after cooling in the pan for a few minutes.

*Disclosure: This page may contain affiliate links. As an Amazon Associate I earn from qualifying purchases, but the price remains the same to you. Thank you for supporting Ellie Likes Cooking!
Save for later!
