Vegan Funfetti Cookies (Gluten-Free)
Crispy, chewy funfetti sugar cookies dotted with colorful sprinkles are a fun and tasty holiday baking project. Dairy-free, egg-free, and gluten-free!

These funfetti cookies are almost as fun to make as they are to eat! Just adding a few sprinkles to a batch of plain sugar cookies makes them so festive and perfect for the holidays! When I was a kid, I helped my mom bake sheet pan sugar cookies and my absolute favorite part was covering the dough in sprinkles right before baking. We would often use three or four different kinds of sprinkles, so the cookies would be super colorful and just so fun! Funfetti cookies are great for baking with kids – let them roll the final dough balls in sprinkles of their choice, then enjoy these vegan and gluten-free cookies together.
Key Ingredients
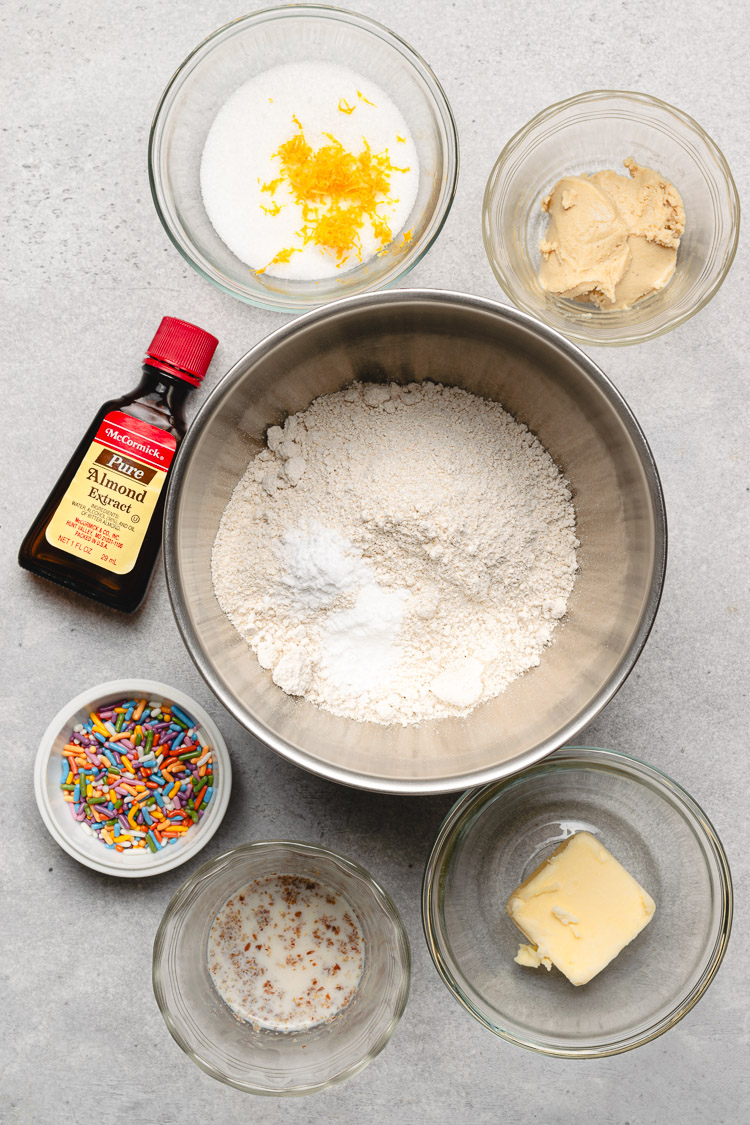
- Oat Flour ⟶ I love making cookies with oat flour because it results in a crispy, chewy texture that isn’t too fluffy or soft like all purpose flour. It also adds a slightly nutty flavor. I make my own oat flour by blending rolled or quick oats in a blender.
- Use gluten-free oats if you are strictly gluten-free (oats themselves do not contain gluten naturally but are often contaminated with it during processing).
- Vegan Butter Sticks ⟶ I prefer melted butter over softened, since softened butter makes cakier cookies (due to the aeration from creaming with sugars) but I like my cookies thinner, crispy, and a bit dense. I’ve made these cookies with Earth Balance and Country Crock Plant Butter.
- Please use butter sticks, not butter spread (these contain more water and will result in a softer cookie).
- Cashew Butter ⟶ I like to use half vegan butter and half nut butter for a slightly thicker cookie. You can use another nut/seed butter, but try to use a light colored one since sugar cookies should be white!
- Ground Flaxseed ⟶ Helps hold the cookies together since oat flour can be a bit crumbly.
- Lemon Zest & Almond Extract ⟶ For extra flavor. You can try another citrus zest or omit but do leave in the almond extract! In a pinch, you can swap almond extract for vanilla extract, but the almond extract flavor is so good in these cookies.
- Sprinkles ⟶ Because it’s not a funfetti cookie without sprinkles!

Tips for Success
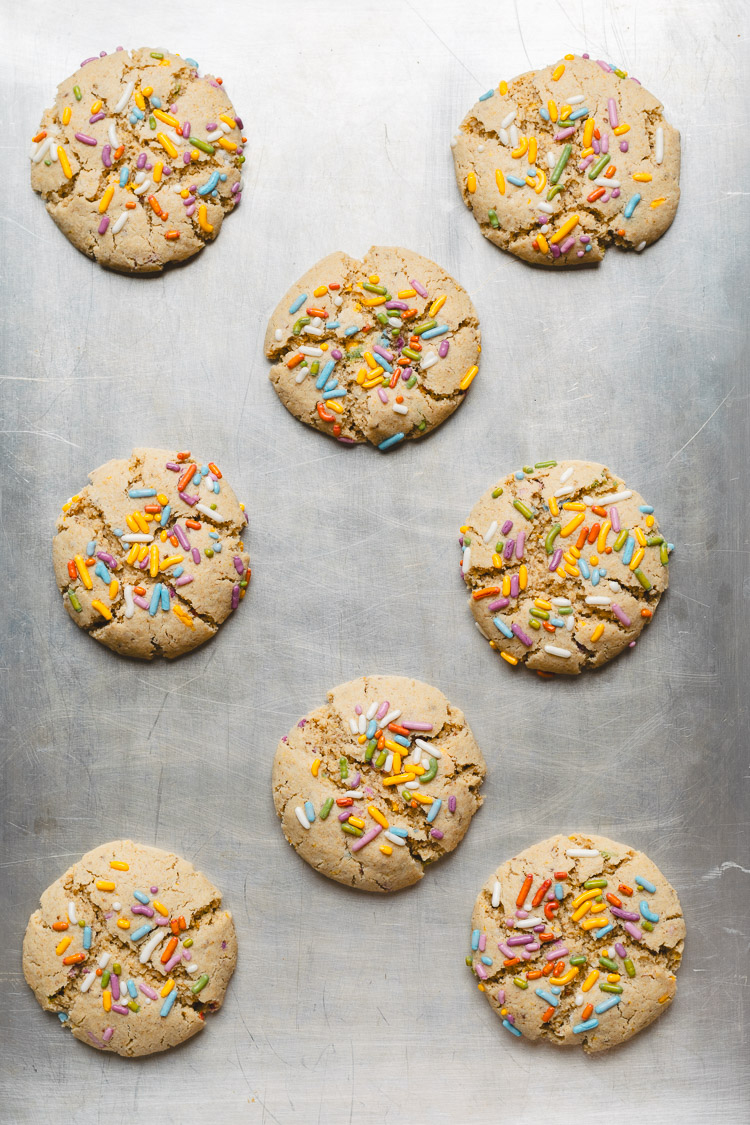
Roll in sprinkles before baking ⟶ A lot of the sprinkles get hidden in the dough when mixing, so if you want them to have a pop of color on the outside, roll in some sprinkles or press some sprinkles on top of each cookie dough ball before baking.
Use runny cashew butter ⟶ Your cashew butter should be thin and runny, meaning it will easily drip off a spoon. If it’s too firm your cookies won’t form properly and they will likely turn out very thick and dry. If your cashew butter is thick from being in the fridge, you can pop it in the microwave for 15 seconds or so to thin it out.
Lemon zest and almond extract add flavor ⟶ Let’s be honest, funfetti cookies don’t taste much like anything other than sugar. They’re fun to make and look at but not the most flavorful to eat. But the addition of lemon zest (or another citrus zest) and almond extract add a little extra flavor that take sugar cookies from OK to YUM!

Funfetti Cookies FAQ
How do I store funfetti cookies?
These cookies will last about 3 days if stored in air tight container at room temperature. For longer storage, freeze for up to 2 months.
What if I don’t have cashew butter?
You can replace the cashew butter with more vegan butter. You can also try macadamia nut butter or tahini, but these have stronger flavors than cashew butter.
Do I really need to chill the cookies before baking?
Yes! Chilling the dough improves the flavor and helps cookies bake up more thick and chewy since the fat in the dough has time to cool. If you don’t chill your cookies, you may end up with thin, flat discs.
Can I make them without sprinkles?
Yes, though they won’t be funfetti cookies but just regular sugar cookies. You can roll the cookie dough balls in sugar before baking for a prettier, crispy finish.

More Vegan Holiday Cookies
- Chocolate Oatmeal Cookies
- Vegan Chocolate Chip Cookies
- Miso Lemon Senbei Cookies
- Thin & Crispy Oatmeal Raisin Cookies
- Apple Pie Snickerdoodles
- Matcha Chocolate Chip Cookies
- Flourless Brownie Cookies
- Thin & Crispy Sugar Cookie Bars
If you make these funfetti cookies, don’t forget to leave a comment/rating down below and tag me in your photos on instagram @ellielikes.cooking. I love seeing all of your tasty recreations!
Vegan Funetti Cookies

Ingredients
- 2 tbsp soy milk
- 2 tsp ground flax
- 96 grams (½ cup) granulated sugar
- 2 tsp lemon zest optional but adds nice flavor
- 52 grams (¼ cup) vegan butter melted
- 60 grams (¼ cup)
cashew butter* use unroasted for neutral flavor - 2 tsp
almond extract* - 180 grams (1½ cups)
gluten-free oat flour* - ½ tsp baking soda
- ½ tsp baking powder
- ¼ cup
sprinkles*
Instructions
- Mix soy milk and ground flaxseed in a small bowl. Set aside to gel.
- Place sugar and lemon zest in a bowl and use your fingers to mix the lemon zest into the sugar.
- Combine melted butter and cashew butter in a large mixing bowl.
- Add lemon sugar and mix to combine.
- Stir in flax mixture and almond extract. Mix until well combined.
- Add flour, baking soda, and baking powder. Mix until a dough forms and no dry flour is left.
- Stir in sprinkles. Don't mix too vigorously or you might break the sprinkles.
- Cover and transfer the dough to the fridge to chill for at least 30 minutes (up to 24 hours).
- Preheat the oven to 350°F and take the dough out of the fridge.
- Scoop about 2 tbsp of dough and roll into balls (you can roll them in sprinkles to make them more visible and colorful on top). Place 2-inches apart on a baking sheet and gently flatten the tops to form thick discs.
- When the oven is ready, place the cookies in the oven and bake 7 minutes. Take the cookies out of the oven and bang the pan on the counter once (this helps flatten the cookies and create that characteristic crackly top). Bake another 3 minutes, then bang the pan on the counter again.
- Let the cookies cool on the baking sheet for 5 minutes, then transfer to a wire rack to finish cooling.

*Disclosure: This page may contain affiliate links. As an Amazon Associate I earn from qualifying purchases, but the price remains the same to you. Thank you for supporting Ellie Likes Cooking!
Save for later!

