Vegan Cinnamon Raisin Milk Bread (Shokupan)
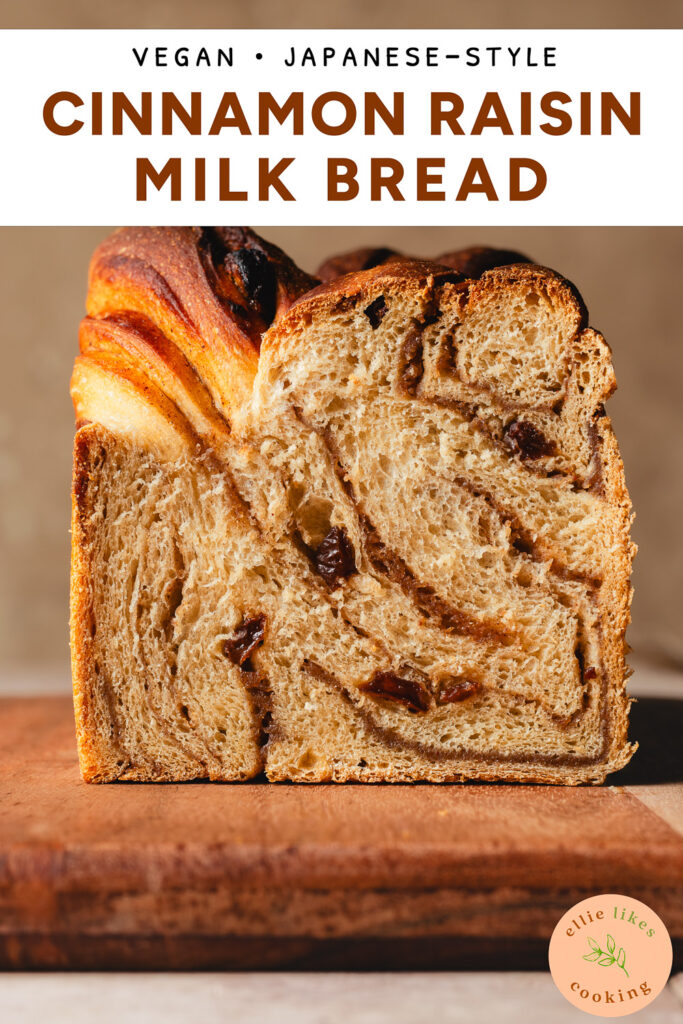
A soft and fluffy vegan Japanese-style milk bread studded with raisins and marbled with a cinnamon sheet. Egg and dairy-free!
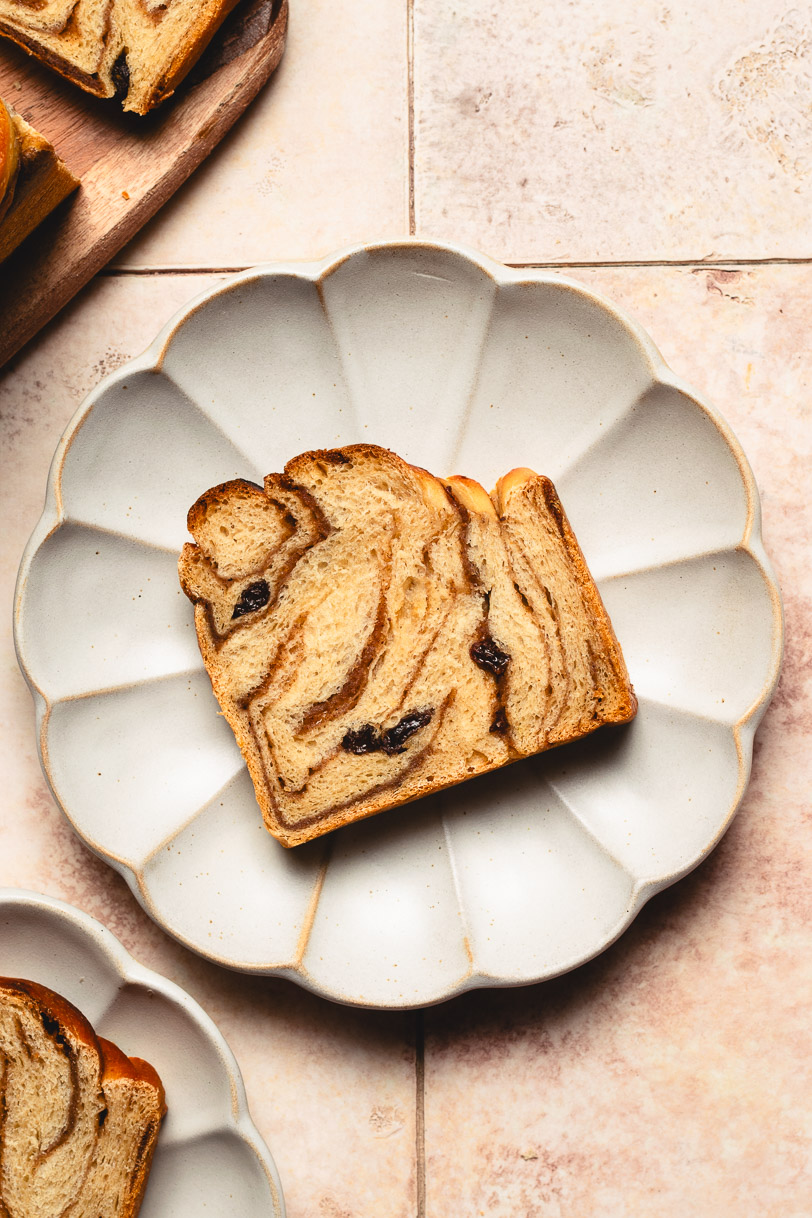
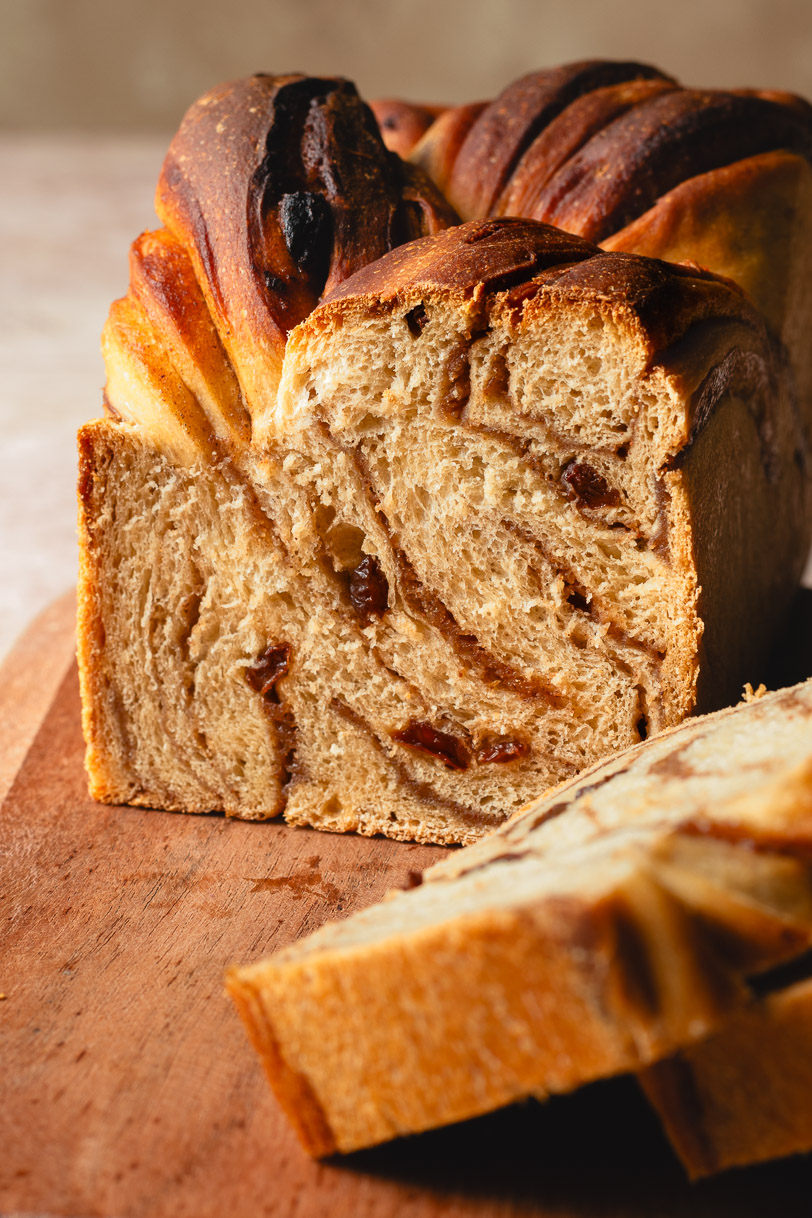
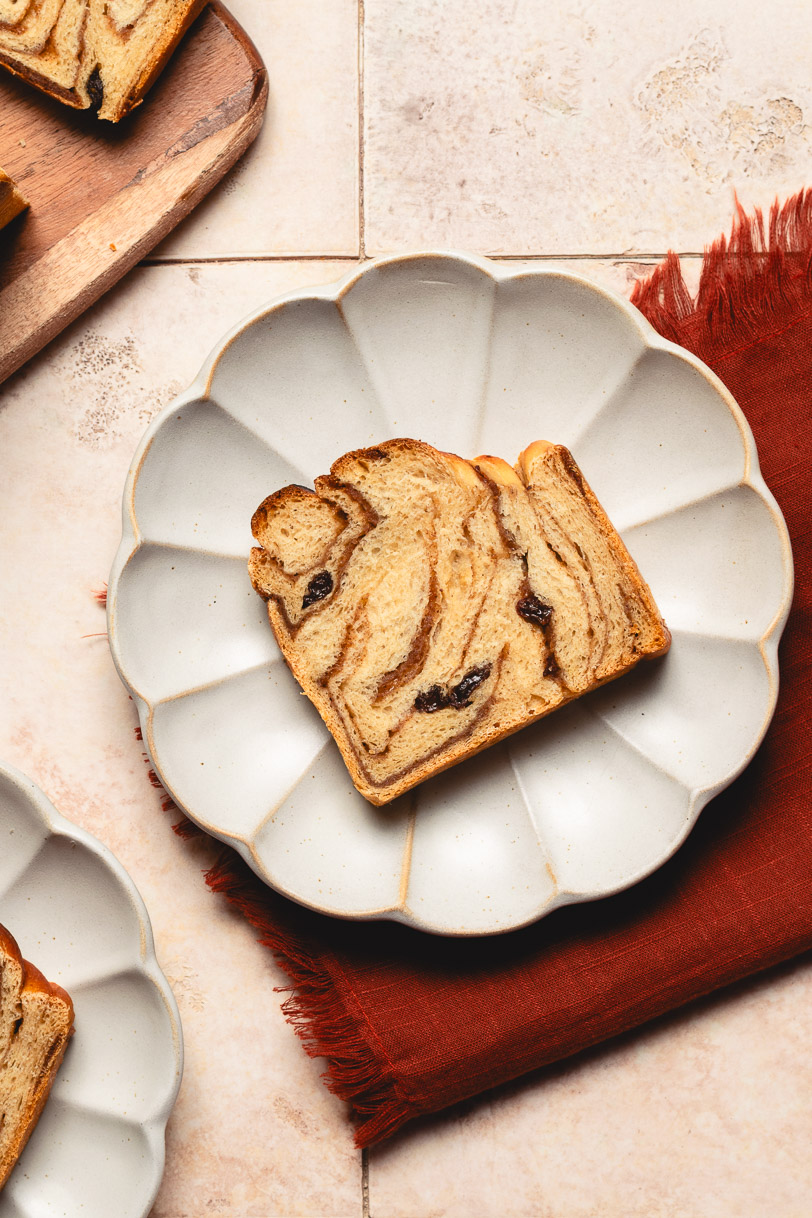
This is vegan cinnamon raisin bread but with a Japanese/Asian-style milk bread base! I took my easy shokupan base recipe and added juicy raisins and sweet cinnamon for a cozy, spiced flavor profile. It’s soft, fluffy, and lightly sweet – perfect for breakfast plain or toasted with butter or peanut butter (my favorite). Leftovers would also make delicious French toast! Check out my chocolate marble milk bread if you’re in the mood for chocolate instead 
How to Make
Note, this is an abbreviated method. For full details see the recipe card at the bottom of the post.
- Knead the dough until it passes the windowpane test. This is a higher hydration dough and requires lots of kneading to achieve a soft, fluffy bread. I highly recommend using a stand mixer if you can, it will be much easier than kneading by hand.
- Proof the dough for 1-3 hours at room temperature. If it’s particularly cold in your kitchen, you can put the dough in a turned off oven with a small pot of boiled water. Or leave in your oven with the light on (but oven turned off).
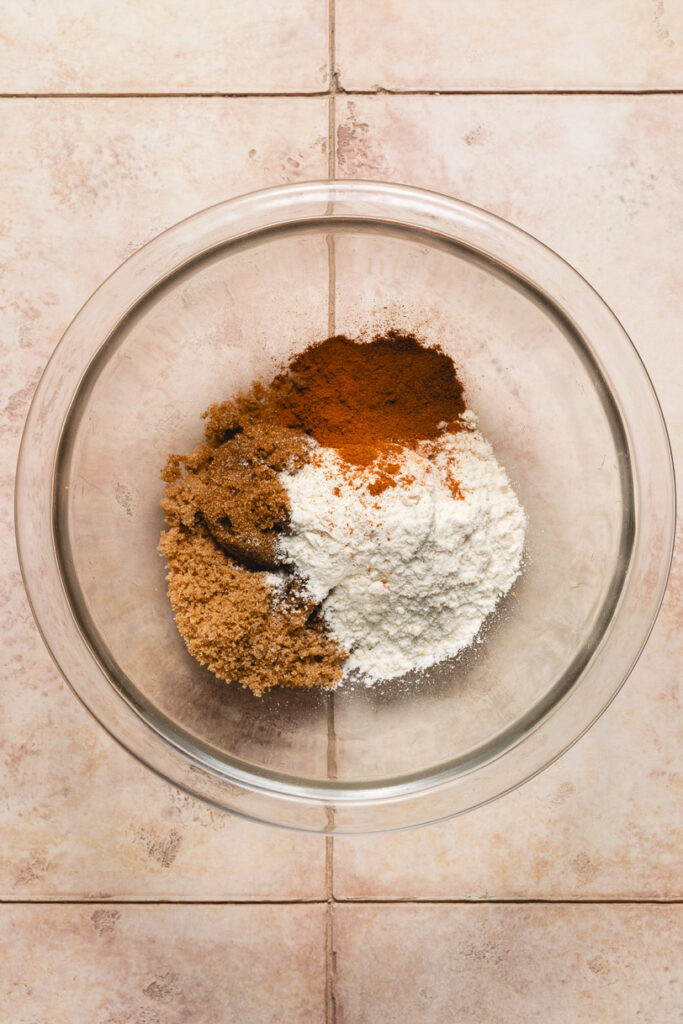
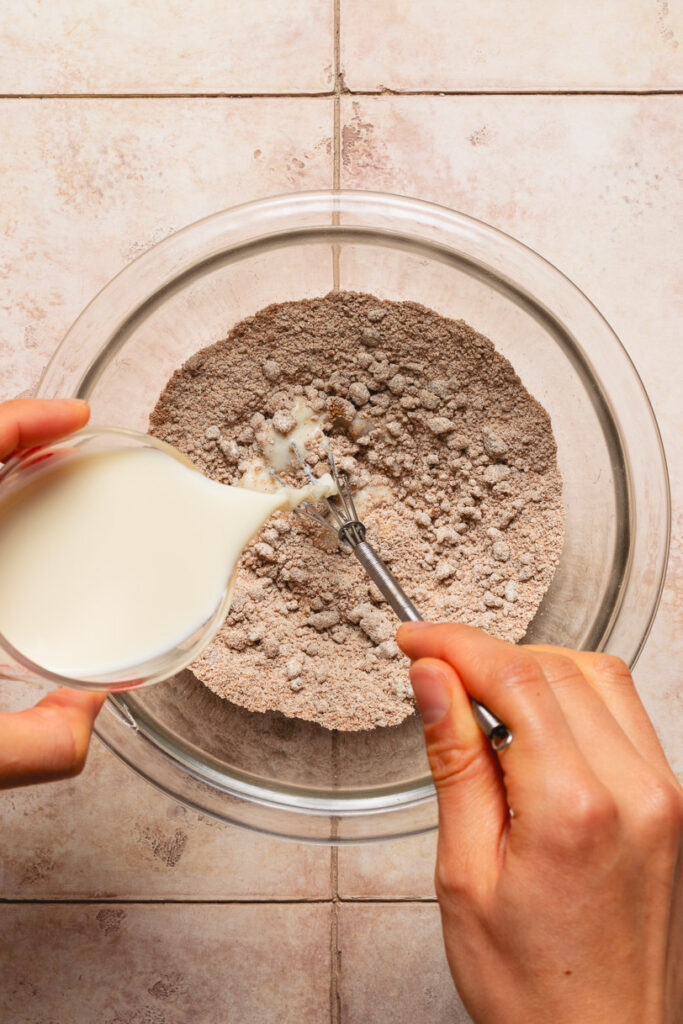
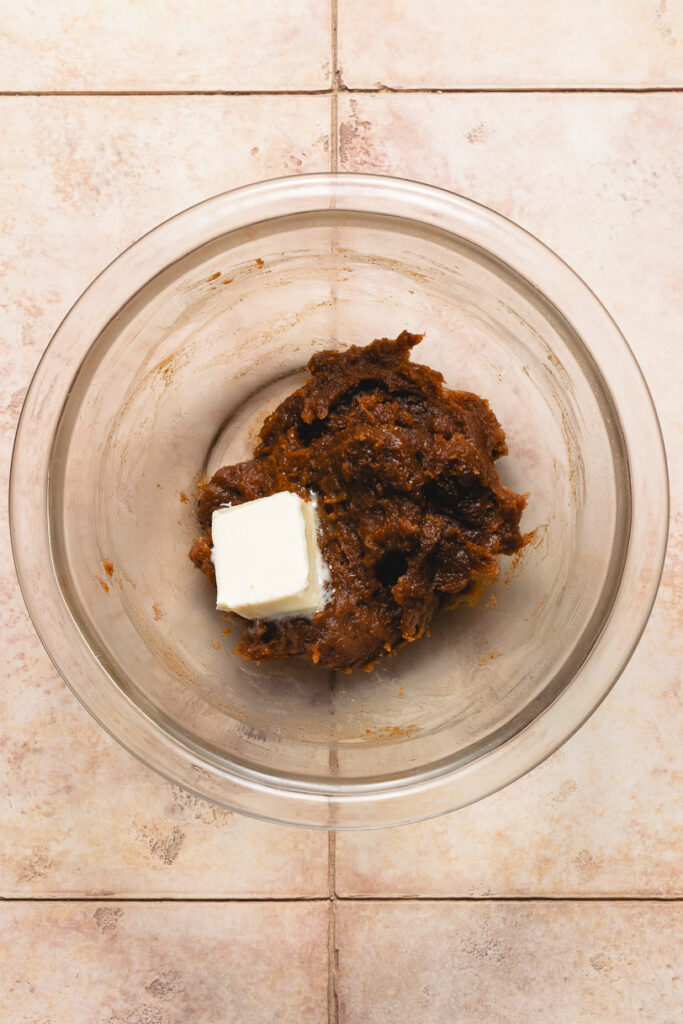
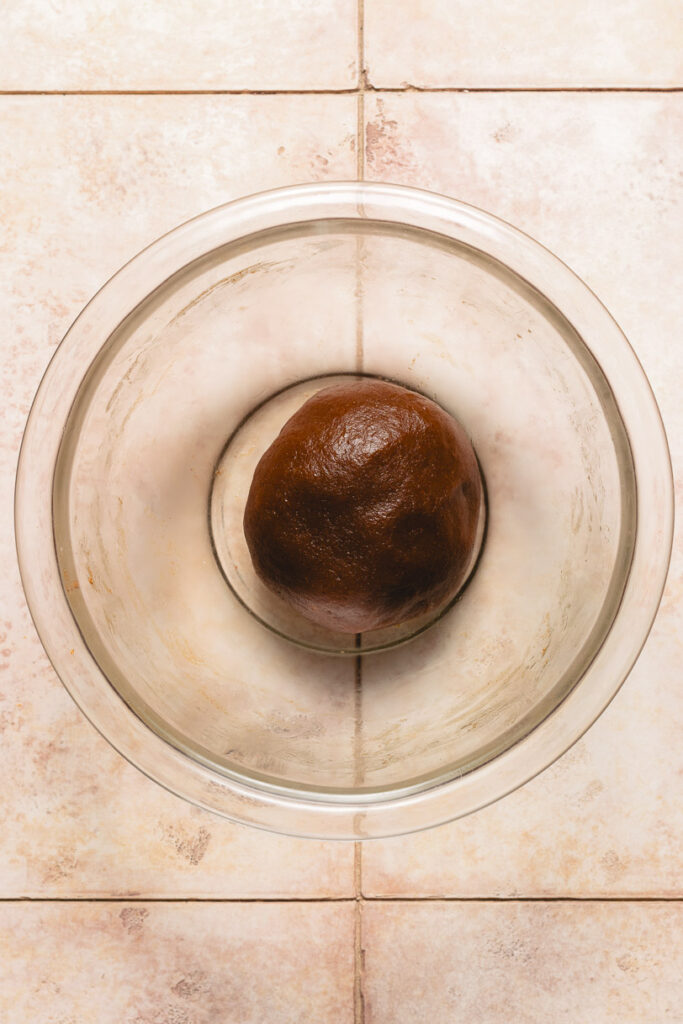
- Prepare the cinnamon sheet while the dough is proofing. Whisk the dry ingredients together first, then whisk in the soy milk. Microwave in 20-second intervals until a thick dough forms, then fold in the butter.


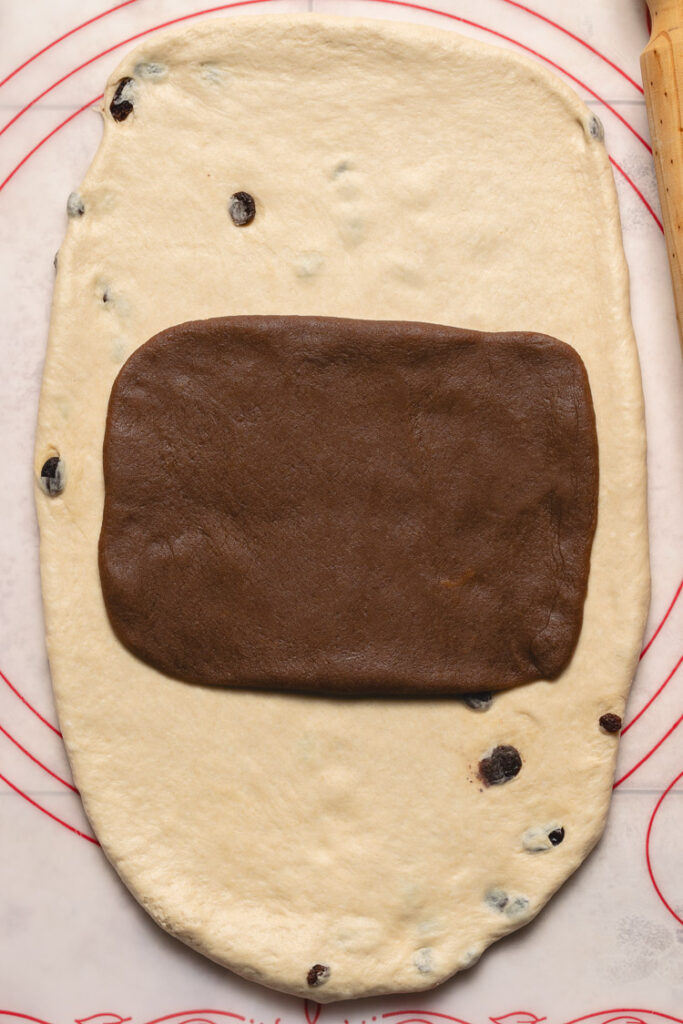
- Roll the dough out into a vertical rectangle and place the cinnamon sheet in the center.
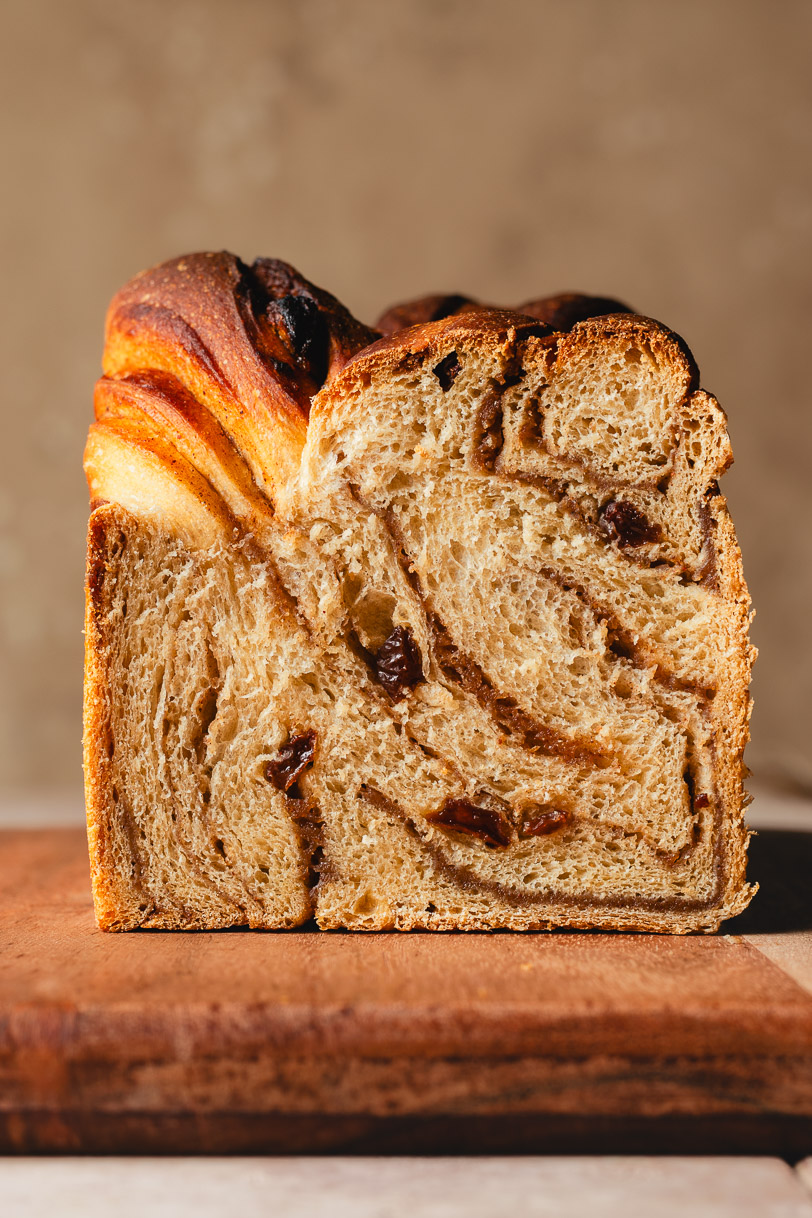
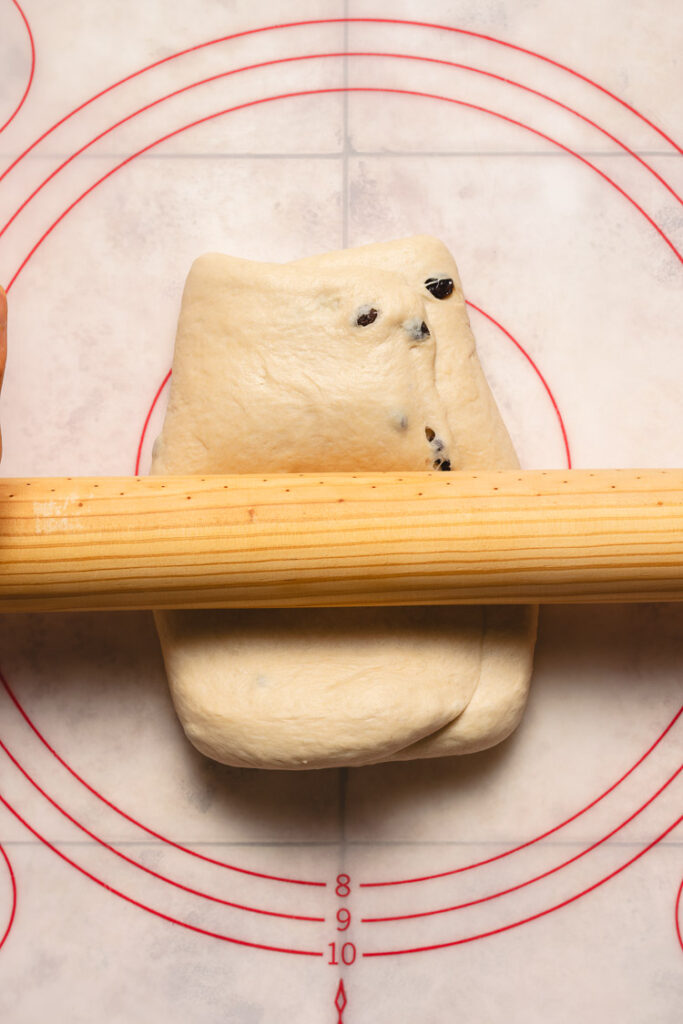
- Laminate the dough and cinnamon sheet to create layers of cinnamon throughout the dough.
How to Laminate Dough
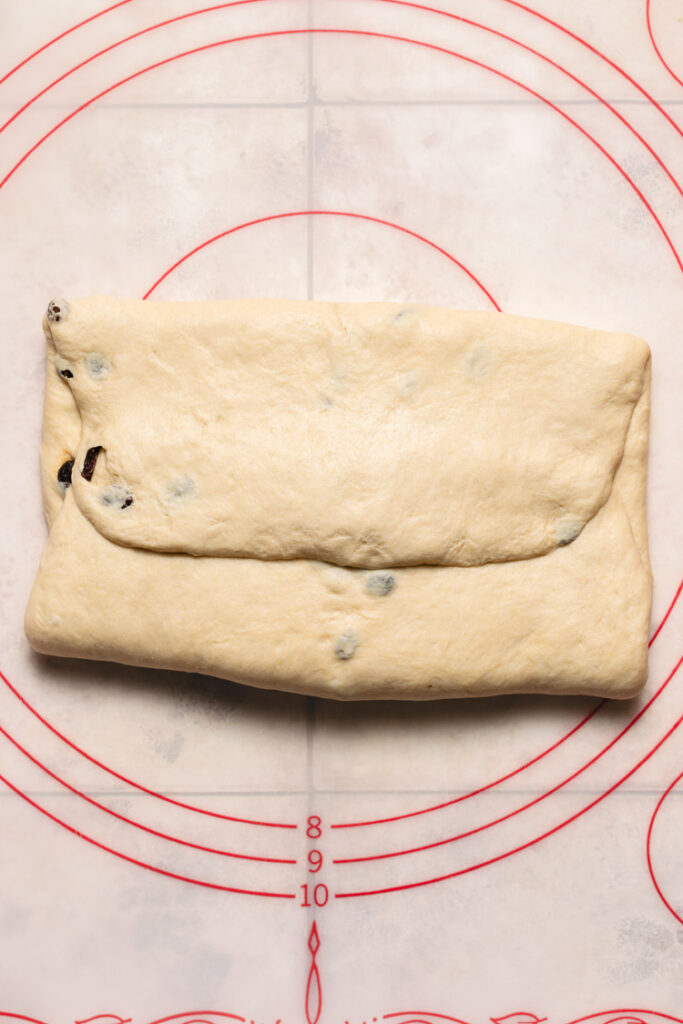
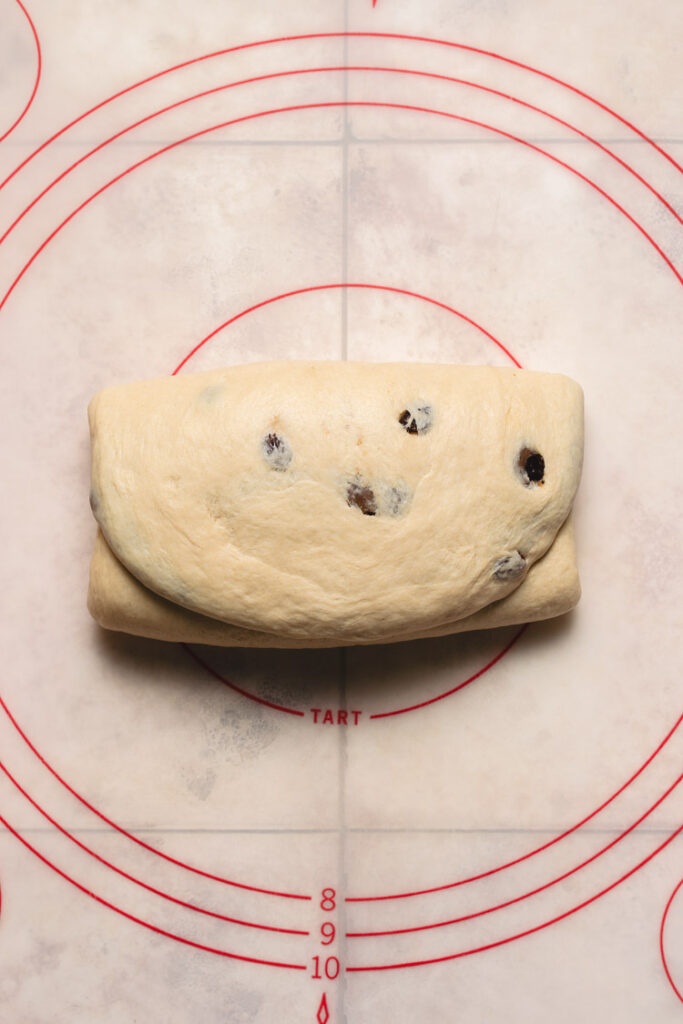
- Fold the dough into thirds over the cinnamon sheet – you will now have a horizontal rectangle.
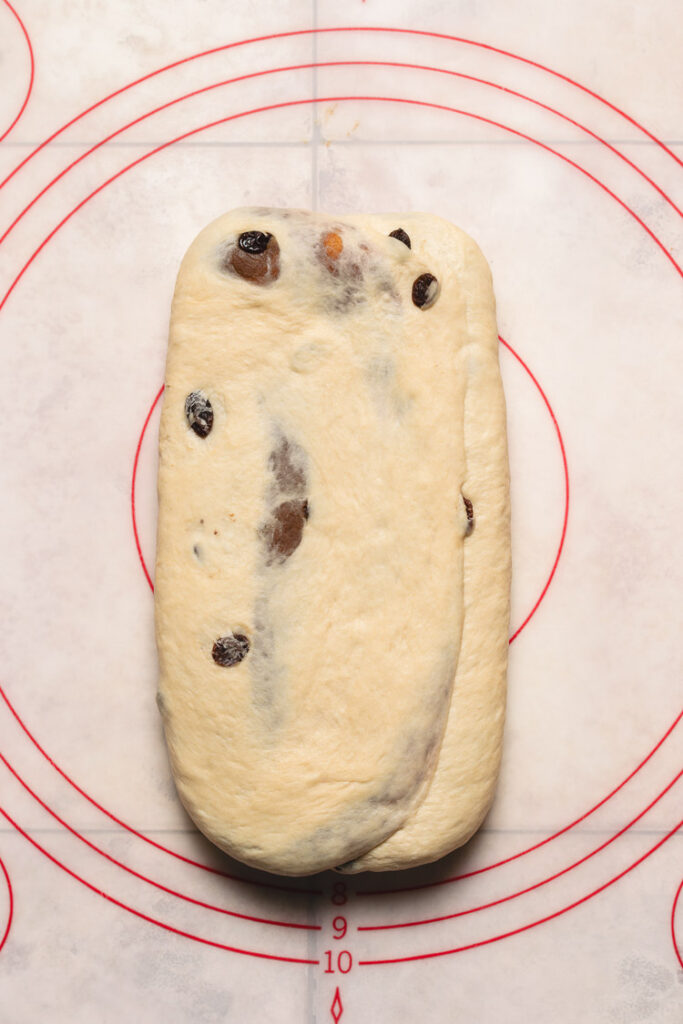
- Rotate the dough 90 degrees so it’s vertical to you.
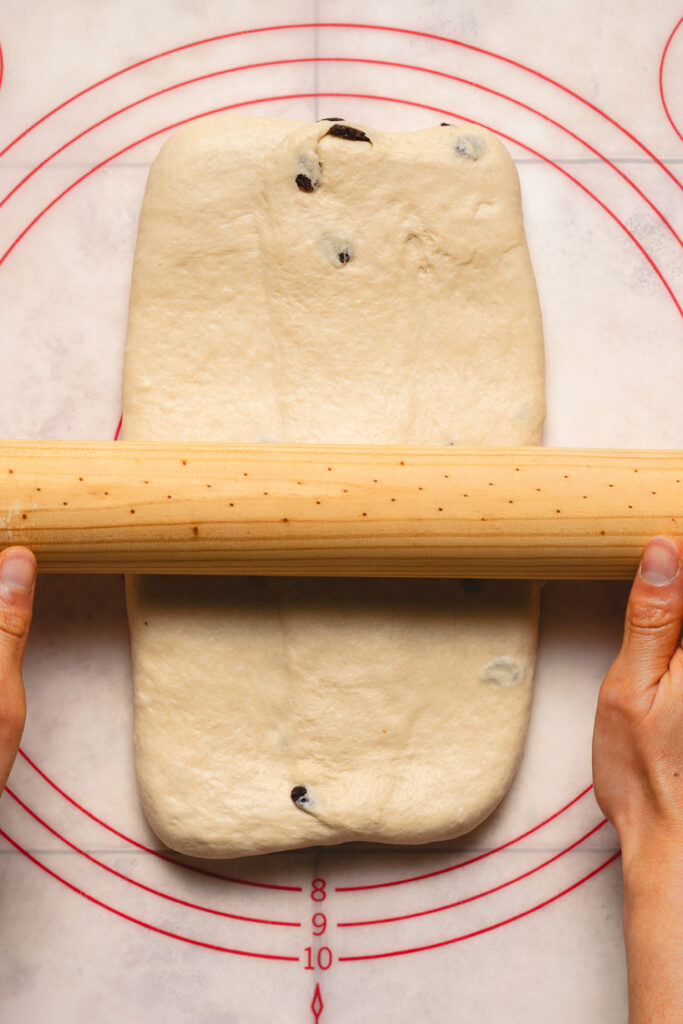
- Roll it out into another large vertical rectangle.
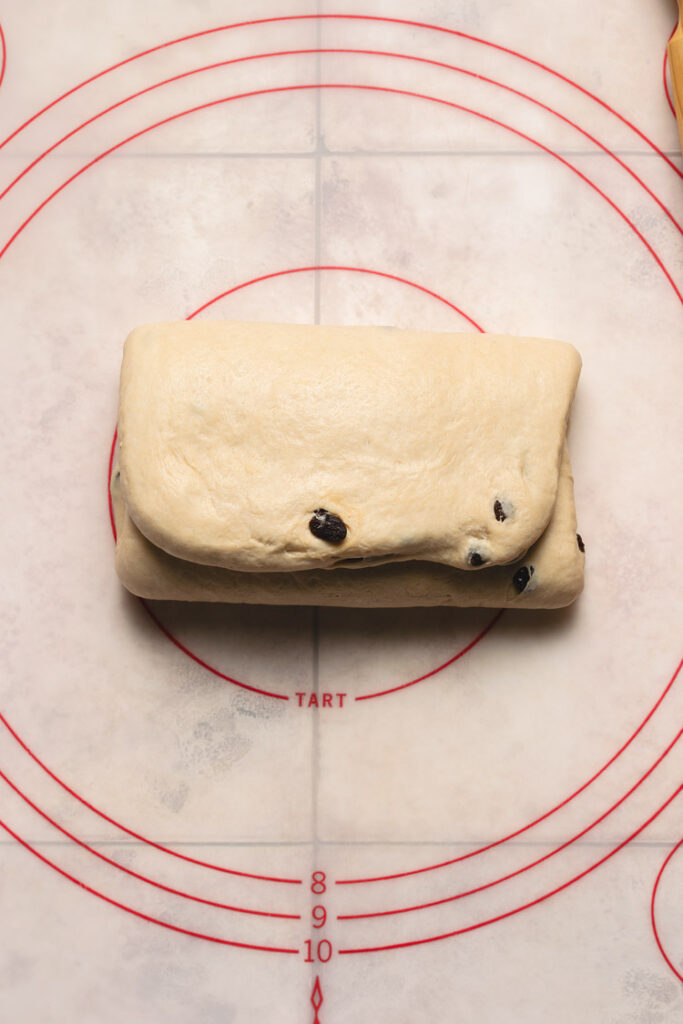
- Repeat folding, rotating, and rolling two to three more times.
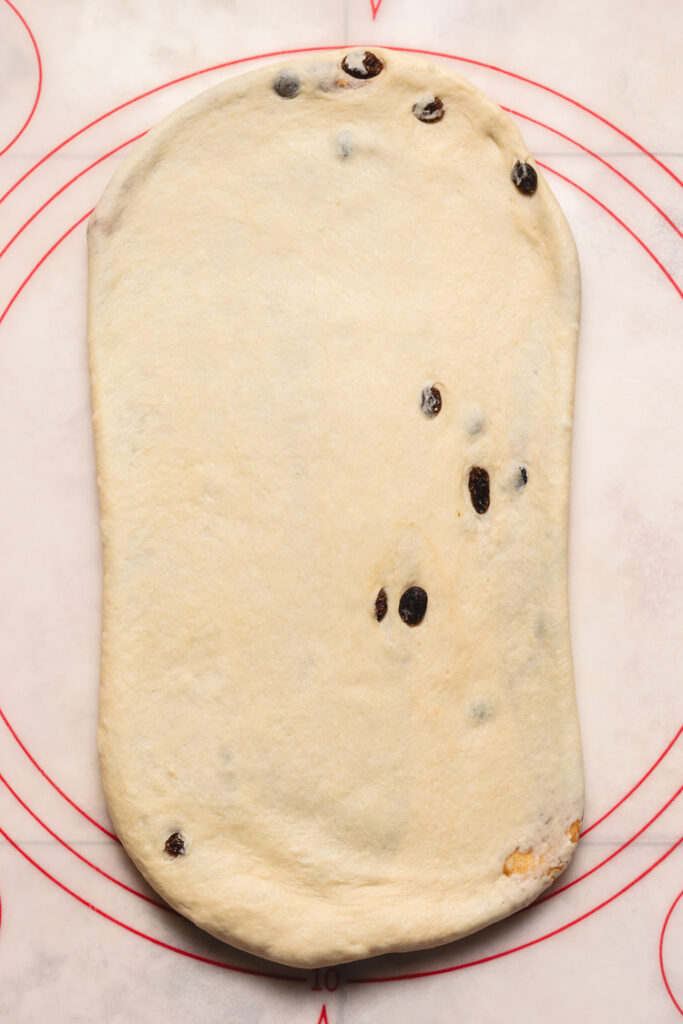
- Finally, roll the dough out into a rectangle the length of your bread pan.
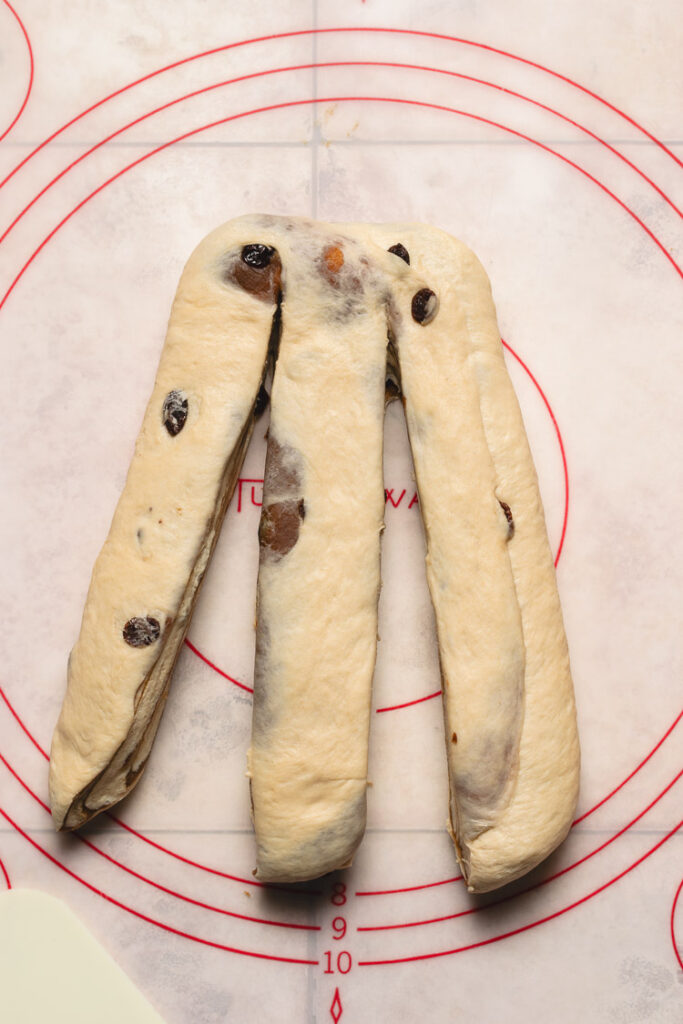
- Cut into three strips, but leave the top 1/2-inch of dough connected.
- Braid the strips together.
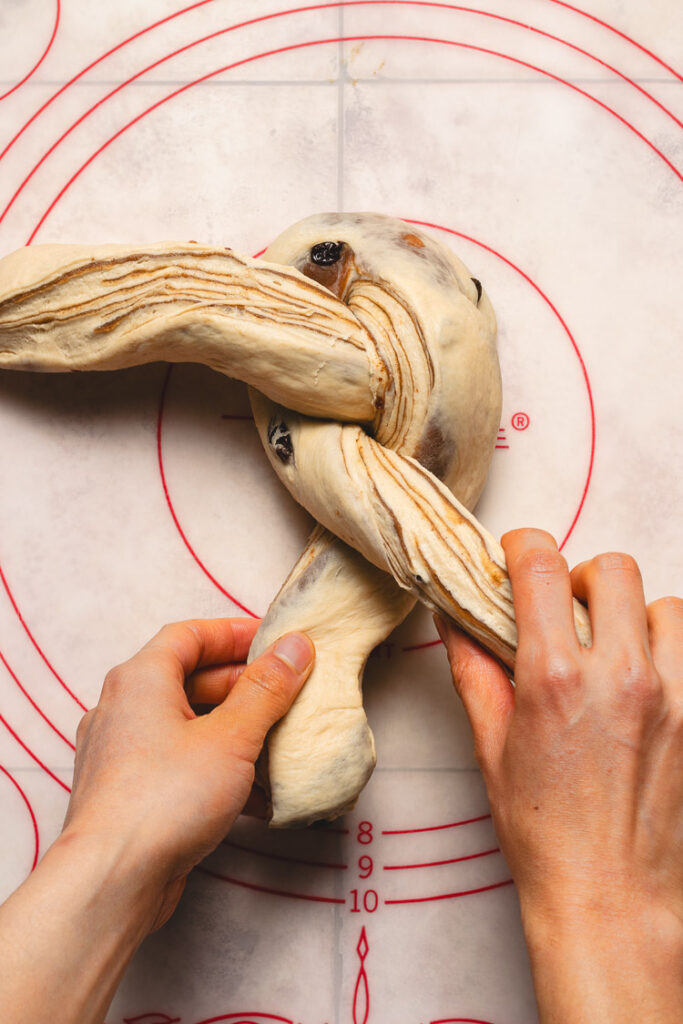
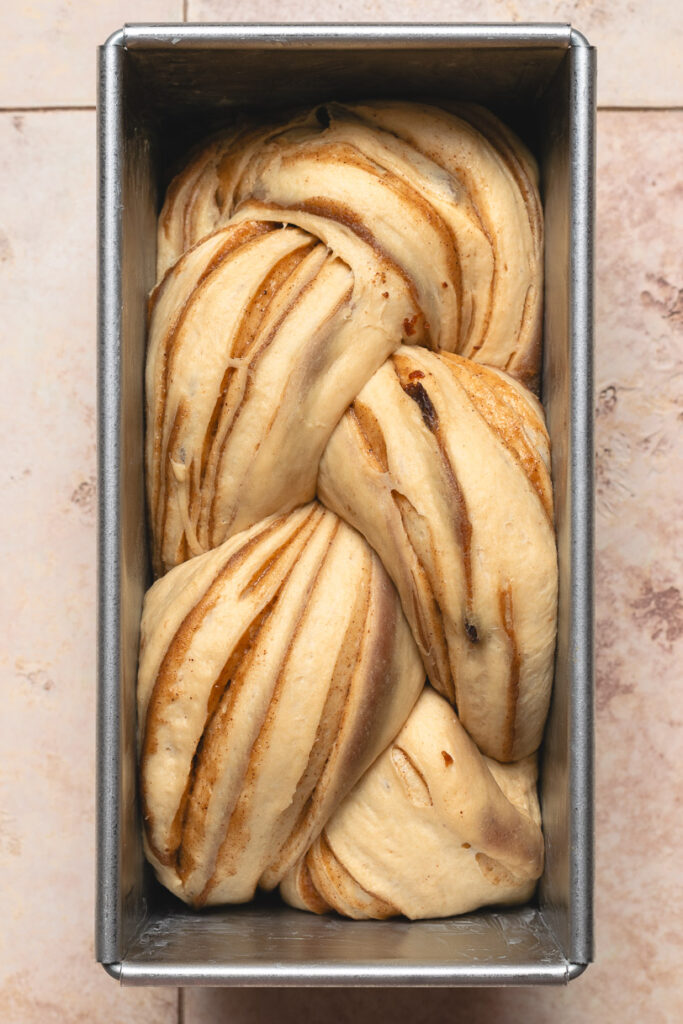
- Proof in bread pan until doubled in size.
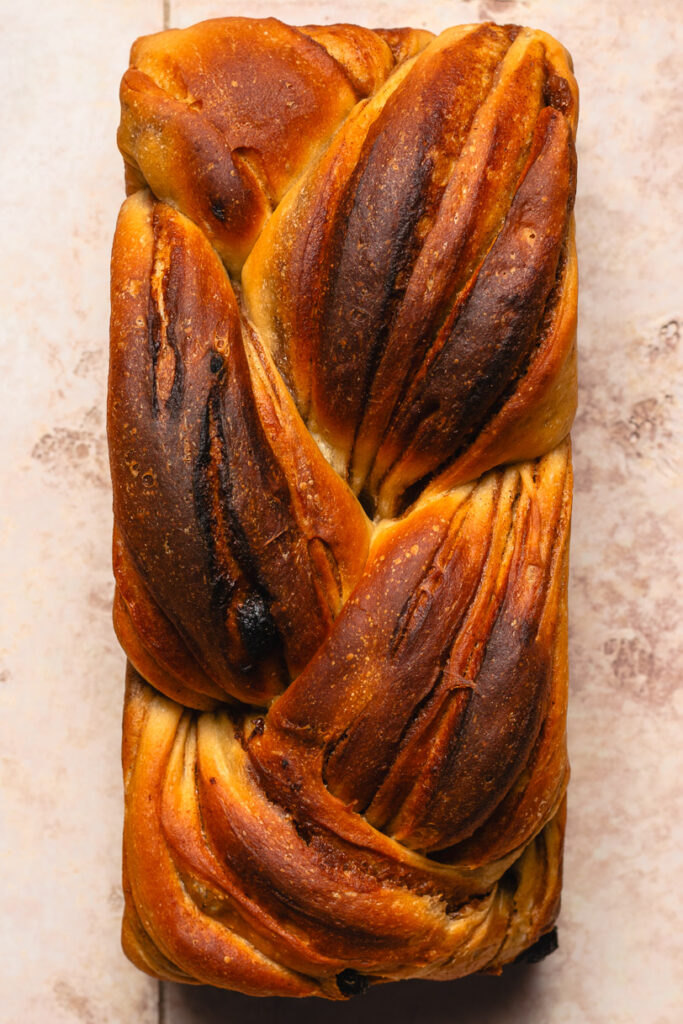
- Bake 30-40 minutes in preheated 385°F oven.
- Cool to room temperature before slicing.

Tips for Success
Knead until windowpane ⟶ If you stop kneading before your dough passes the windowpane test, it will rip more easily and the resulting bread won’t be as soft and pillowy.
Tip: If you’re having trouble getting the dough sufficiently kneaded, let it rest for 10 minutes to relax the gluten.
Use a stand mixer ⟶ Kneading the dough with a stand mixer will save you a lot of time and effort. This is a looser dough and will stick to your hands a lot in the beginning if you knead by hand. I use a Kitchen Aid mixer but there are more affordable stand mixers* that should do the trick (be sure you get a dough hook with yours!).
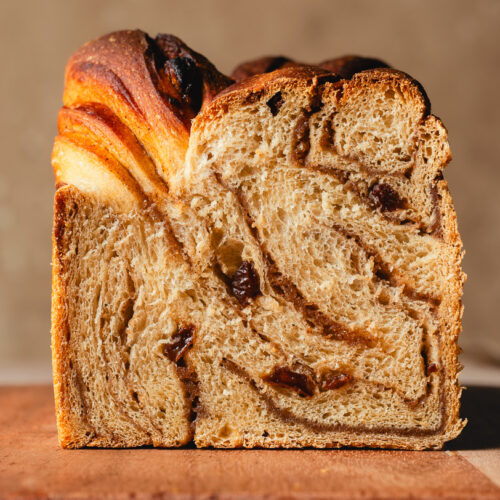
Cinnamon sheet vs cinnamon sugar filling ⟶ To achieve the cinnamon swirls in the bread, we make a cinnamon sheet which has a firm dough texture. This is different from the typical American cinnamon raisin bread which uses a basic cinnamon sugar filling. The cinnamon sheet requires slightly more effort (still pretty easy!), but it’s much less messy and very tasty! Plus you can create a beautiful marbled pattern in the bread instead of just swirls.
Laminate the dough ⟶ To achieve the beautiful marbled look, we laminate the dough after adding the cinnamon sheet. I like to do about 3 laminations. Don’t overdo it or you will overwork the dough and it won’t rise as well.
Cool before slicing ⟶ I know it’s tempting to cut into it right after you take it out of the oven, but patience is key to a good bread! If you cut into it too early, your bread can lose a lot of moisture and may shrink.
Transfer to wire rack immediately ⟶ Don’t leave the bread in the pan after baking or moisture will pool on the bottom and sides and make your bread soggy. Immediately take it out of the pan (it should come out easily if you thoroughly greased your pan) and place on a wire rack to cool.
Cinnamon Raisin Milk Bread FAQ
More Vegan Yeast Breads
- Chocolate Marble Milk Bread
- Pumpkin Dinner Rolls
- Anpan (Japanese Red Bean Bun)
- Seeded Multigrain Bread (No Knead)
- Pumpkin Melon Pan
- Melon Pan
If you try out this recipe, don’t forget to leave a comment/rating down below and tag me in your photos on instagram @ellielikes.cooking. I love seeing all of your tasty recreations!
Vegan Cinnamon Raisin Milk Bread (Shokupan)
Equipment
- 1 1 lb (1斤) Japanese rectangular loaf pan
Ingredients
Bread
- 100 ml soy milk
- 65-80 ml water1
- 18 grams (1½ tbsp) sugar
- 240 grams (2 cups)
bread flour*2 - ½ tsp (3g) salt
- 1 tsp (3.5g)
instant yeast* - ⅓ tsp cinnamon optional
- 20 grams (1½ tbsp) unsalted vegan butter3 cut into small cubes
- ⅓ cup raisins
Cinnamon Sheet
- 20 grams (3 tbsp) bread flour
- 30 grams (2½ tbsp) granulated sugar
- 2 tsp cinnamon
- 70 ml soy milk
- 10 grams (1 tbsp) vegan butter
Instructions
Make Dough (Stand Mixer – Recommended Method)
- Add soy milk, water1, and sugar to the bowl of your stand mixer. Add bread flour, wheat flour, and vital wheat gluten on top. Add salt to one side of the bowl and instant yeast to the other side.
- Attach a dough hook to your stand mixer. Turn it on at low speed to combine the ingredients, then gradually increase speed to medium as the dough comes together. Knead on medium for about 5 minutes. The dough should come together into a ball and loose some of its stickiness. Turn off the stand mixer, cover with a towel, and let the dough rest for 10 minutes.
- Turn the mixer back on at low speed and gradually add in the butter cubes. Increase the speed to medium as the butter gets incorporated into the dough. Continue kneading on medium speed (4-5) for about 10-15 minutes. You can stop to scrape down the dough every 5 minutes or so if needed. If your mixer gets too hot, turn if off, cover the dough, and let it rest for 5-10 minutes.
Make Dough (By Hand)
- Clean a work surface or set out a large pastry mat and lightly dust with bread flour.
- Whisk together flours, vital wheat gluten, sugar, salt, and yeast. Pour in soy milk and water and use a wooden spoon to mix until a dough starts to form. Gather the dough into a loose ball and transfer to your work surface.
- Knead the dough for 5-10 minutes until a tight dough forms and it looses some of its stickiness. If the dough is too sticky, you can sprinkle some flour on top but try not to add too much flour or your bread will turn out dense. Dough will stick to your hands during kneading but just keep kneading! Cover and let the dough rest for 10 minutes.
- Stretch the dough out into a long rectangle and add the butter pieces on top. Roll up the dough and continue kneading. It will be very messy and greasy at first but keep going! After a couple minutes the dough will become smooth and easier to work with.
- Continue kneading for another 10-15 minutes.
Windowpane Test
- Use the windowpane test4 to check if the dough is sufficiently kneaded. Tear off a small piece of dough and gently stretch it into a square, pulling at the four corners. You should be able to stretch the dough out into a very thin membrane that light can pass through. If the dough tears easily, it needs to be kneaded longer.
First Proof
- Shape the dough into a ball and place in a large bowl (you can use the bowl of your stand mixer). Cover with a towel or plastic wrap and set on the counter to rise for 1-3 hours until doubled in size.
Cinnamon Sheet
- While the dough is proofing, prepare the cinnamon sheet. In a microwave-safe bowl, whisk together bread flour, sugar, and cinnamon. Whisk in soy milk.
- Microwave in 20-second intervals, stirring after each interval, until a thick dough forms and no liquid is left (about 1 minute total). Add butter and stir until butter is incorporated in the dough (it will melt in the residual heat).
- Place dough on a large piece of plastic wrap. Fold the plastic wrap over the dough into a rectangle, then use a rolling pin to roll out the cinnamon sheet into the rectangle. (This will go in the center of the bread dough after the first proof.) Place in the fridge until ready to use.
Laminate Dough
- Punch down the dough and transfer to your work surface.
- Roll dough out into a vertical rectangle. Unwrap cinnamon sheet and place it horizontally in the center of the bread dough.
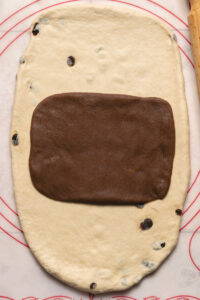
- Fold dough into thirds over the cinnamon sheet.
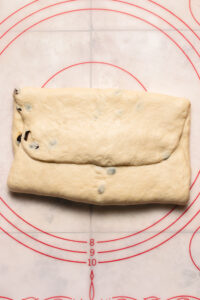
- Rotate the dough 90 degrees and roll it out again into a vertical rectangle. Fold dough into thirds and rotate 90 degrees. Repeat the process (roll out, fold into thirds, rotate) two more times.
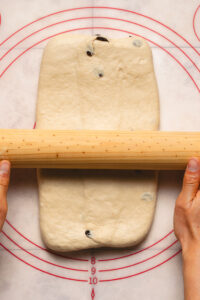
- Cover the dough and let it rest for 10 minutes.
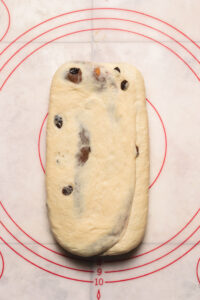
- Finally, roll the dough out into a rectangle the length of your bread pan. Cut into thirds about a 1/2-inch down from the top of the rectangle (leave the dough connected at the top), and braid the strands together.
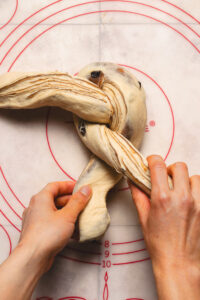
- Grease your bread pan generously with vegan butter.
Second Proof
- Place the braided dough into your greased bread pan. Cover and let the dough proof until doubled in size, about 1 hour.
- When the dough has risen a little over halfway (after about 40-60 minutes), preheat oven to 385°F/195°C (or 360°F/180°C for convection oven).
Bake
- Uncover the dough and place into the oven on the middle rack. Bake for 30-40 minutes, until the internal temperature reaches 195°F/90°C. It should be nicely browned on the outside and spring back when you push on it. Tent with foil if the top is browning too quickly (check after 15 minutes).
Cool
- Tap the pan on the countertop 1-2 times to let water vapor escape (this prevents the bread from shrinking).
- Turn the pan on its side and give it a few thrusts to slide the bread out. Place the bread on a wire rack to cool completely.
- Let the bread cool completely before slicing so the structure can set. If you cut into the bread too soon, it may shrink and lose moisture.
Notes

*Disclosure: This page may contain affiliate links. As an Amazon Associate I earn from qualifying purchases, but the price remains the same to you. Thank you for supporting Ellie Likes Cooking!
Save for later!
